![SDL - 2025 New Logo.png]](https://help.getsdl.com/hs-fs/hubfs/SDL%20-%202025%20New%20Logo.png?height=40&name=SDL%20-%202025%20New%20Logo.png)

26 STEPS
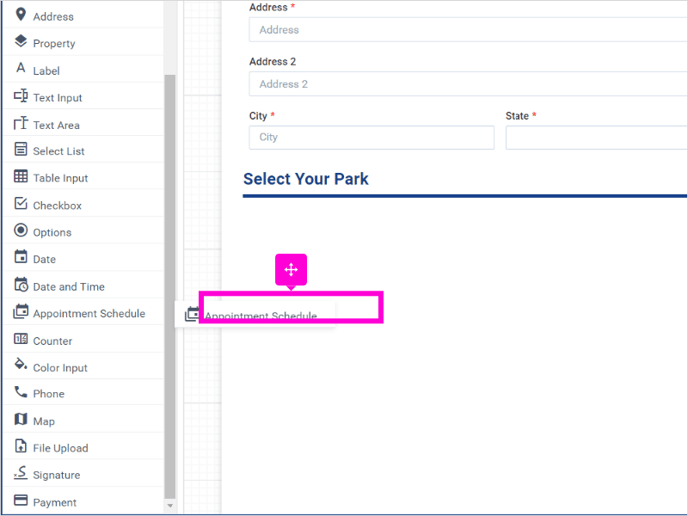
1. When building your form in SDL Online, drag the Appointment Schedule section type and drop it into your form.
.png?width=688&height=516&name=1_800x600_z-undefined_mz-0.5_mi-1_ti-0_ar-1_cr-0_si-0_fr-0_tb-1_t-_ftc-_ftb-_mc-_mfc-_complete%20(2).png)
1b. Drop
2. Click select a location
.png?width=688&height=516&name=2_800x600_z-undefined_mz-0.5_mi-1_ti-0_ar-1_cr-0_si-0_fr-0_tb-1_t-_ftc-_ftb-_mc-_mfc-_complete%20(2).png)
3. Then click Schedule Options on the right-hand side to add your locations
.png?width=688&height=516&name=3_800x600_z-undefined_mz-0.5_mi-1_ti-0_ar-1_cr-0_si-0_fr-0_tb-1_t-_ftc-_ftb-_mc-_mfc-_complete%20(2).png)
4. Click Location 1
.png?width=688&height=516&name=4_800x600_z-undefined_mz-0.5_mi-1_ti-0_ar-1_cr-0_si-0_fr-0_tb-1_t-_ftc-_ftb-_mc-_mfc-_complete%20(2).png)
5. Click Edit
.png?width=688&height=516&name=5_800x600_z-undefined_mz-0.5_mi-1_ti-0_ar-1_cr-0_si-0_fr-0_tb-1_t-_ftc-_ftb-_mc-_mfc-_complete%20(1).png)
6. Add the name of your location to the text field.
.png?width=688&height=516&name=6_800x600_z-undefined_mz-0.5_mi-1_ti-0_ar-1_cr-0_si-0_fr-0_tb-1_t-_ftc-_ftb-_mc-_mfc-_complete%20(1).png)
7. To add a description or pictures of the location, click Description
.png?width=688&height=516&name=7_800x600_z-undefined_mz-0.5_mi-1_ti-0_ar-1_cr-0_si-0_fr-0_tb-1_t-_ftc-_ftb-_mc-_mfc-_complete%20(1).png)
8. To add a picture of the location, click insert and select Image from the drop down menu
.png?width=688&height=516&name=8_800x600_z-undefined_mz-0.5_mi-1_ti-0_ar-1_cr-0_si-0_fr-0_tb-1_t-_ftc-_ftb-_mc-_mfc-_complete%20(1).png)
9. Click Upload and select the image you want to use from your files.
Note: You may need to adjust the dimensions to have it appear properly. We used 300 x 200
.png?width=688&height=516&name=9_800x600_z-undefined_mz-0.5_mi-1_ti-0_ar-1_cr-0_si-0_fr-0_tb-1_t-_ftc-_ftb-_mc-_mfc-_complete%20(1).png)
10. The image will be added to your description field.
.png?width=688&height=516&name=10_800x600_z-undefined_mz-0.5_mi-1_ti-0_ar-1_cr-0_si-0_fr-0_tb-1_t-_ftc-_ftb-_mc-_mfc-_complete%20(1).png)
11. To add a description under the picture such as location information or available amenities, simply type.
-1.png?width=688&height=516&name=11_800x600_z-undefined_mz-0.5_mi-1_ti-0_ar-1_cr-0_si-0_fr-0_tb-1_t-_ftc-_ftb-_mc-_mfc-_complete%20(1)-1.png)
12. Your description will appear under the picture. Press save.
.png?width=688&height=516&name=12_800x600_z-undefined_mz-0.5_mi-1_ti-0_ar-1_cr-0_si-0_fr-0_tb-1_t-_ftc-_ftb-_mc-_mfc-_complete%20(1).png)
13. In addition to the description, you can also adjust the time slots, date availability, start and end dates and block specific days.
.png?width=688&height=516&name=13_800x600_z-undefined_mz-0.5_mi-1_ti-0_ar-1_cr-0_si-0_fr-0_tb-1_t-_ftc-_ftb-_mc-_mfc-_complete%20(1).png)
14. To establish appointment slots, select the amount of time under Slot Duration.
.png?width=688&height=516&name=14_800x600_z-undefined_mz-0.5_mi-1_ti-0_ar-1_cr-0_si-0_fr-0_tb-1_t-_ftc-_ftb-_mc-_mfc-_complete%20(1).png)
15. Enter the amount of reservations allowed per day under Max Slots per Day and then pick the slot start and end times.
.png?width=688&height=516&name=15_800x600_z-undefined_mz-0.5_mi-1_ti-0_ar-1_cr-0_si-0_fr-0_tb-1_t-_ftc-_ftb-_mc-_mfc-_complete%20(1).png)
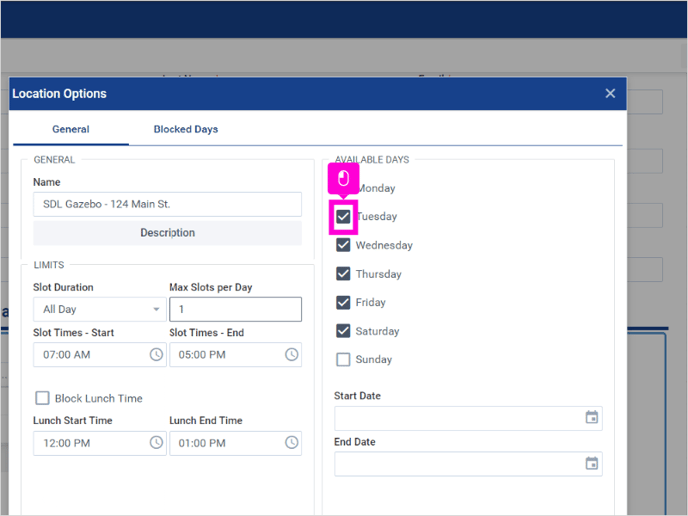
16. Choose the days of the week that the public is able to schedule for that location.
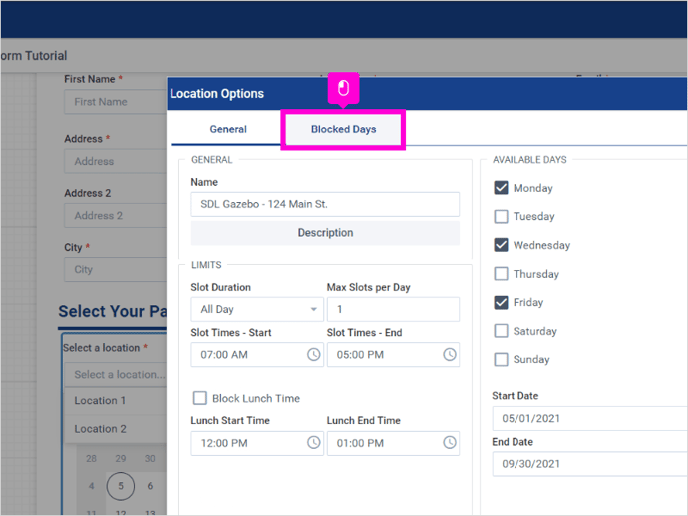
17. Click Blocked Days to add, edit or delete days that will appear as unavailable for scheduling.
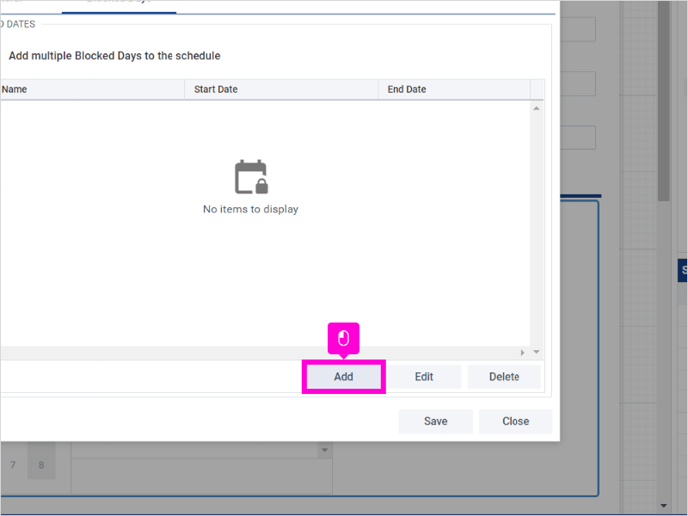
18. To add a date, click the Add button
19. Click on the calendar next to Start Date and End Date to establish these blocks.
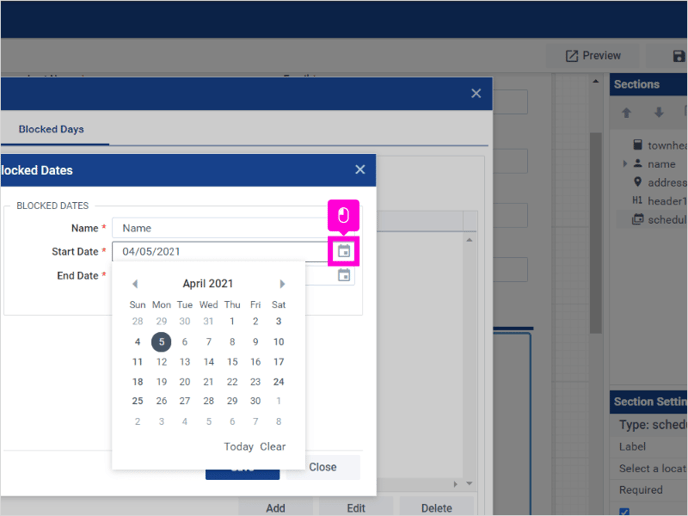
20. Enter a Name for this block
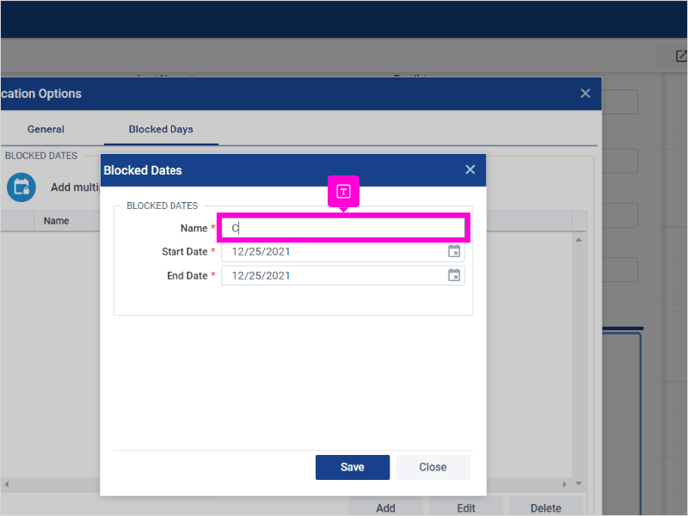
21. Click Save
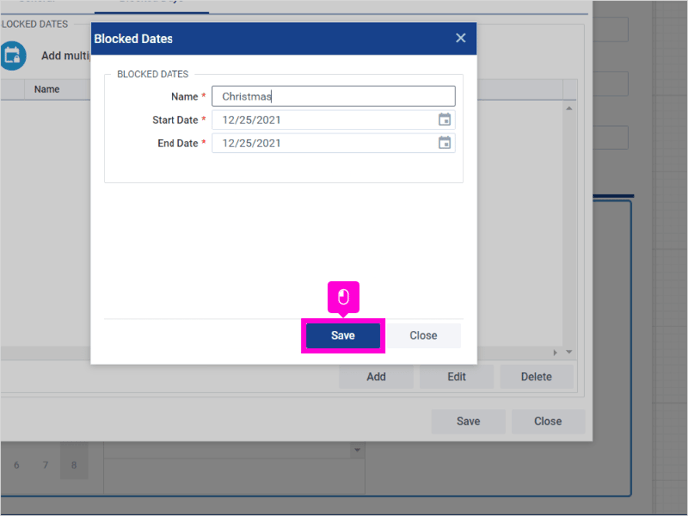
22. Your blocked date(s) will now appear. Click Save
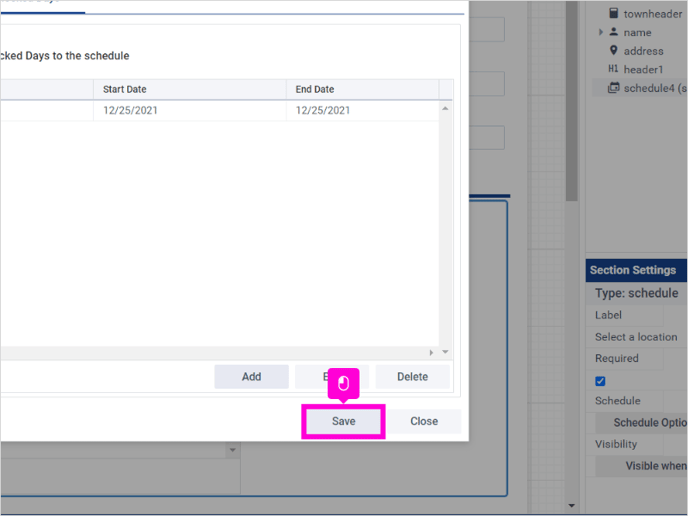
23. Back in the Schedule Options screen, you will see the location you just set up and you can add, edit or delete other locations.
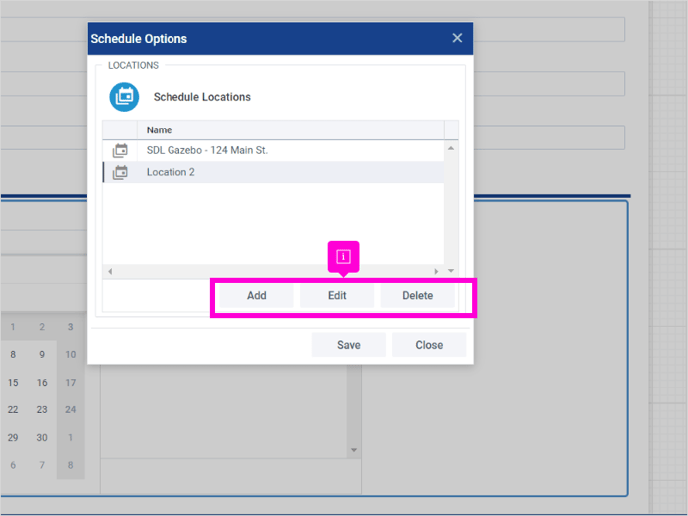
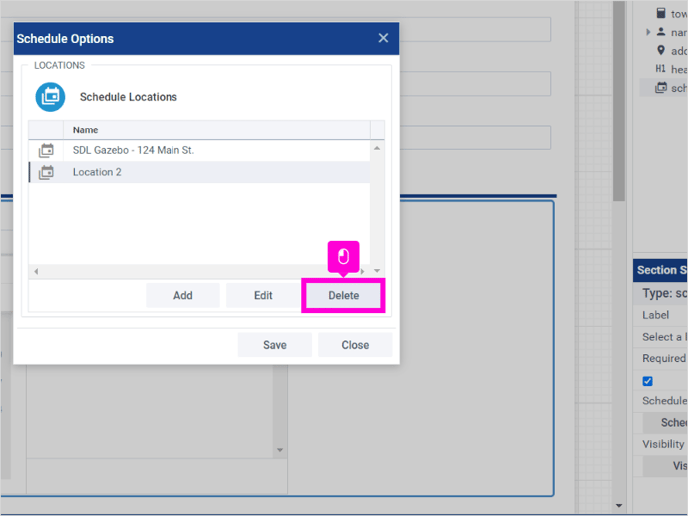
24. To remove the other location, click Delete and follow the prompts
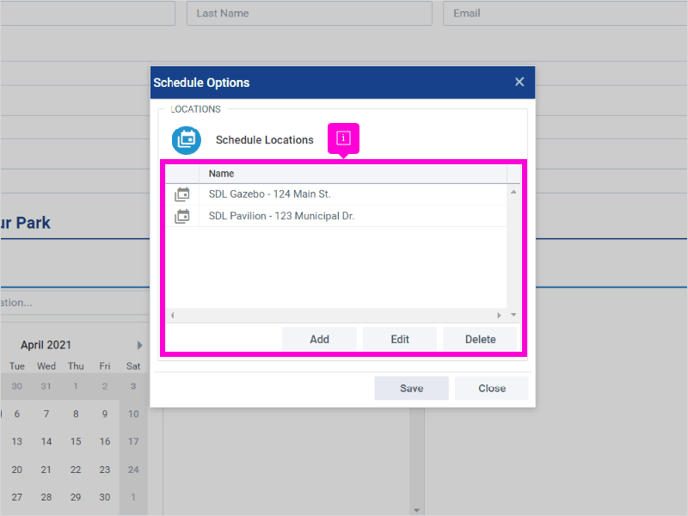
25. If you opted to add another location, that secondary location will also appear in this screen once you have finished adding the location information.
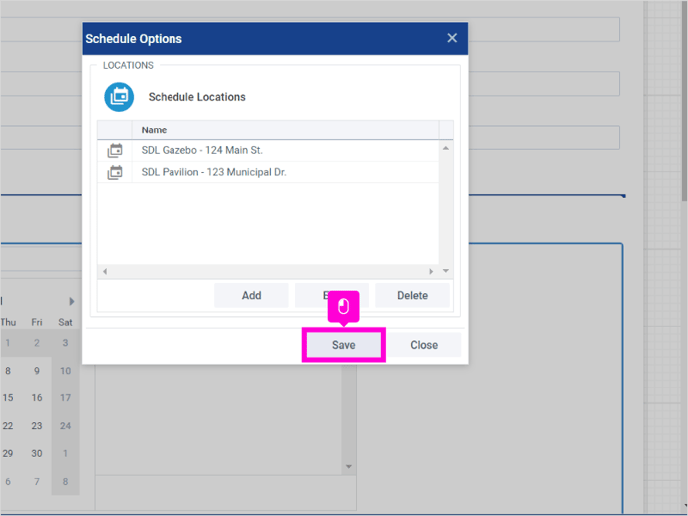
26. To exit the scheduling tool, click Save
Here's an interactive tutorial