![SDL - 2025 New Logo.png]](https://help.getsdl.com/hs-fs/hubfs/SDL%20-%202025%20New%20Logo.png?height=40&name=SDL%20-%202025%20New%20Logo.png)
1. The first step is to open SDL Desktop
-png.png?width=670&height=503&name=1_800x600_z-undefined_mz-0-5_mi-1_ti-0_ar-1_cr-0_si-0_fr-0_tb-1_t-_ftc-_ftb-_mc-_mfc-_complete%20(1)-png.png)
2. Make sure you are on the Home Page
-png.png?width=670&height=503&name=2_800x600_z-undefined_mz-0-5_mi-1_ti-0_ar-1_cr-0_si-0_fr-0_tb-1_t-_ftc-_ftb-_mc-_mfc-_complete%20(1)-png.png)
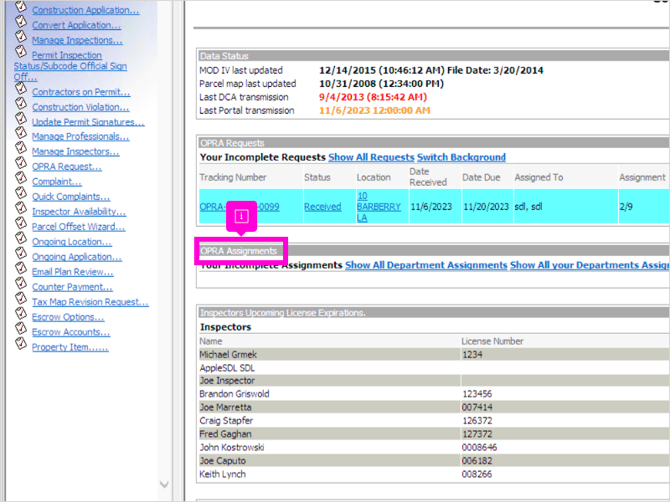
3. The OPRA Assignments section on your Home Page will display all OPRA Assignments that have been created and sent to you.
-png.png?width=670&height=503&name=3_800x600_z-undefined_mz-0-5_mi-1_ti-0_ar-1_cr-0_si-0_fr-0_tb-1_t-_ftc-_ftb-_mc-_mfc-_complete%20(1)-png.png)
4. You can toggle the view to display All OPRA Assignments for the Module you are currently in.
-png.png?width=670&height=503&name=4_800x600_z-undefined_mz-0-5_mi-1_ti-0_ar-1_cr-0_si-0_fr-0_tb-1_t-_ftc-_ftb-_mc-_mfc-_complete%20(1)-png.png)
5. If you work in multiple modules, you can also view All OPRA Assignments assigned to you throughout all Departments.
-png.png?width=670&height=503&name=5_800x600_z-undefined_mz-0-5_mi-1_ti-0_ar-1_cr-0_si-0_fr-0_tb-1_t-_ftc-_ftb-_mc-_mfc-_complete%20(1)-png.png)
6. The Tracking Number is unique to the OPRA Assignment. Multiple OPRA Assignments can be created for one OPRA Request, depending on how many individuals or departments need to respond.
-png.png?width=670&height=503&name=6_800x600_z-undefined_mz-0-5_mi-1_ti-0_ar-1_cr-0_si-0_fr-0_tb-1_t-_ftc-_ftb-_mc-_mfc-_complete%20(1)-png.png)
7. The Request Number is unique to the main OPRA Request.
-png.png?width=670&height=503&name=7_800x600_z-undefined_mz-0-5_mi-1_ti-0_ar-1_cr-0_si-0_fr-0_tb-1_t-_ftc-_ftb-_mc-_mfc-_complete%20(1)-png.png)
8. If this OPRA Assignment is related to a specific property, you will see the property here.
-png.png?width=670&height=503&name=8_800x600_z-undefined_mz-0-5_mi-1_ti-0_ar-1_cr-0_si-0_fr-0_tb-1_t-_ftc-_ftb-_mc-_mfc-_complete%20(1)-png.png)
9. You will be able to see the Status of your OPRA Assignment here. You can change the Assignment as you are working on the response.
-png.png?width=670&height=503&name=9_800x600_z-undefined_mz-0-5_mi-1_ti-0_ar-1_cr-0_si-0_fr-0_tb-1_t-_ftc-_ftb-_mc-_mfc-_complete%20(1)-png.png)
10. You will also be able to see both the date the OPRA was assigned to you and the date your response is due back to your OPRA Custodian.
-png.png?width=670&height=503&name=10_800x600_z-undefined_mz-0-5_mi-1_ti-0_ar-1_cr-0_si-0_fr-0_tb-1_t-_ftc-_ftb-_mc-_mfc-_complete%20(1)-png.png)
11. The Department the OPRA Assignment is related to displays here.
-png.png?width=670&height=503&name=11_800x600_z-undefined_mz-0-5_mi-1_ti-0_ar-1_cr-0_si-0_fr-0_tb-1_t-_ftc-_ftb-_mc-_mfc-_complete%20(1)-png.png)
12. The date the last reminder was sent out will display here.
-png.png?width=670&height=503&name=12_800x600_z-undefined_mz-0-5_mi-1_ti-0_ar-1_cr-0_si-0_fr-0_tb-1_t-_ftc-_ftb-_mc-_mfc-_complete%20(1)-png.png)
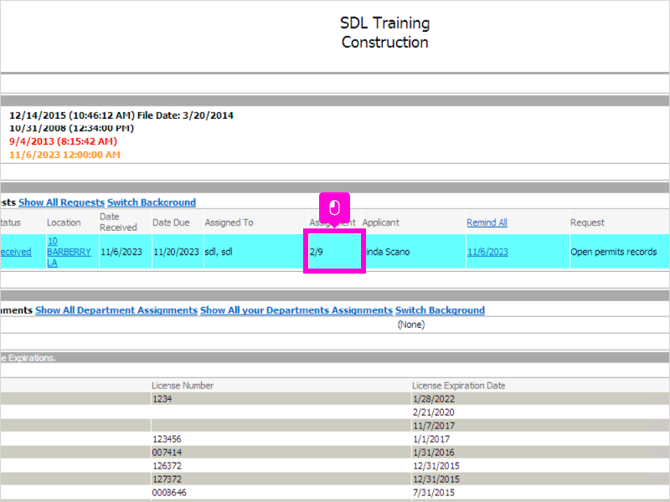
13. The directions provided from the OPRA Custodian will display here.
-png.png?width=670&height=503&name=13_800x600_z-undefined_mz-0-5_mi-1_ti-0_ar-1_cr-0_si-0_fr-0_tb-1_t-_ftc-_ftb-_mc-_mfc-_complete%20(1)-png.png)
14. To open your OPRA Assignment and take action on it, click the Tracking Number.
-png.png?width=670&height=503&name=14_800x600_z-undefined_mz-0-5_mi-1_ti-0_ar-1_cr-0_si-0_fr-0_tb-1_t-_ftc-_ftb-_mc-_mfc-_complete%20(1)-png.png)
15. The OPRA Assignment will open to the Assignments tab. The left side of this page will display Assignment information, such as which user and department the OPRA Assignment is assigned to, the status, and the due date.
-png.png?width=670&height=503&name=15_800x600_z-undefined_mz-0-5_mi-1_ti-0_ar-1_cr-0_si-0_fr-0_tb-1_t-_ftc-_ftb-_mc-_mfc-_complete%20(1)-png.png)
16. The top of the right side will display the Directions provided from the OPRA custodian.
-png.png?width=670&height=503&name=16_800x600_z-undefined_mz-0-5_mi-1_ti-0_ar-1_cr-0_si-0_fr-0_tb-1_t-_ftc-_ftb-_mc-_mfc-_complete%20(1)-png.png)
17. As you work on completing this OPRA Assignment, you can change the status and status date to reflect where the Assignment stands.
-png.png?width=670&height=503&name=17_800x600_z-undefined_mz-0-5_mi-1_ti-0_ar-1_cr-0_si-0_fr-0_tb-1_t-_ftc-_ftb-_mc-_mfc-_complete%20(1)-png.png)
18. The Requester tab will display the information of the citizen who submitted the OPRA request, along with their original request.
-png.png?width=670&height=503&name=18_800x600_z-undefined_mz-0-5_mi-1_ti-0_ar-1_cr-0_si-0_fr-0_tb-1_t-_ftc-_ftb-_mc-_mfc-_complete%20(1)-png.png)
19. The Request Tab will show the entire OPRA Request status and details, including the internal notes.
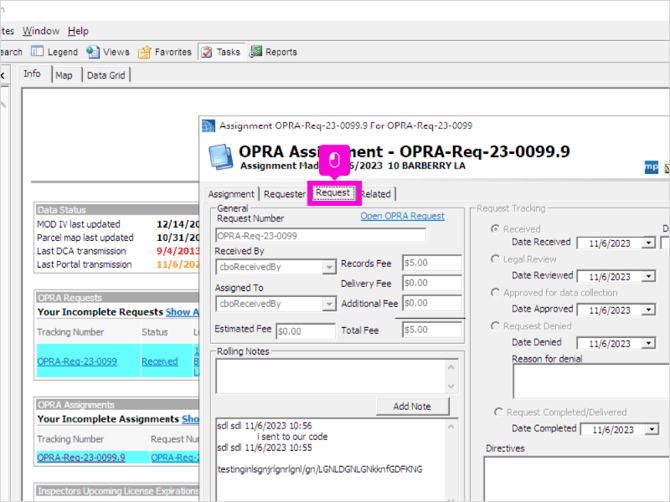
20. The Related Tab will contain attachments from the main OPRA Request.
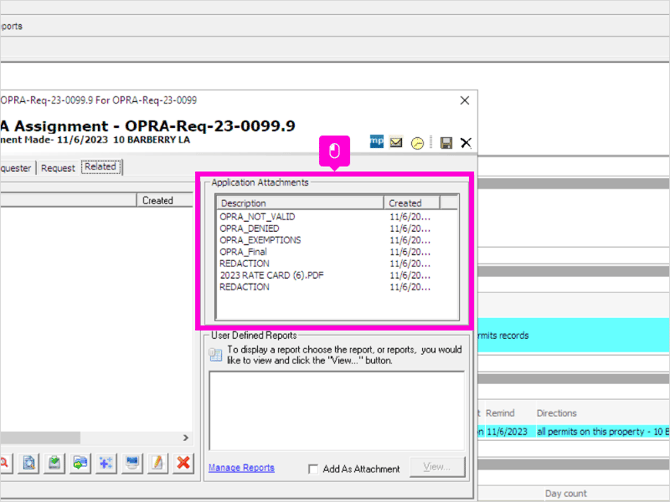
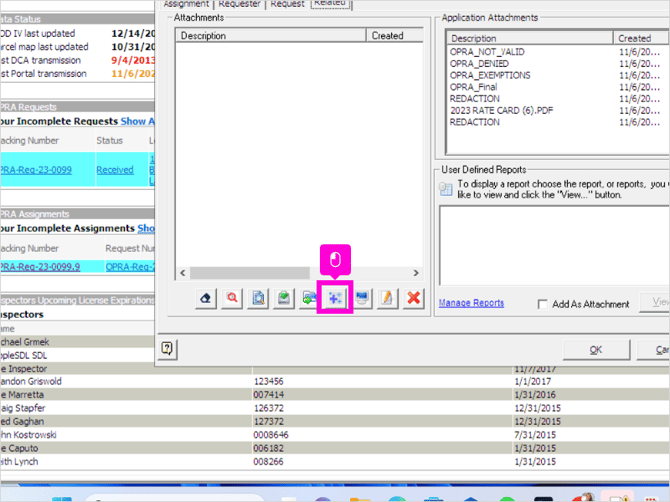
21. This is also where you will upload any documents that are needed for your OPRA Assignment response. Use the Blue Plus button to upload your local documents.
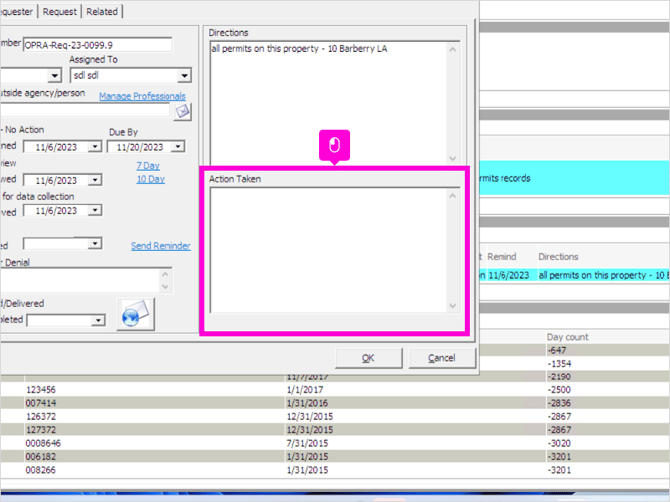
22. When you're ready to complete the OPRA Assignment and send it back to the OPRA Custodian, you can include any pertinent information in the Action Taken section.
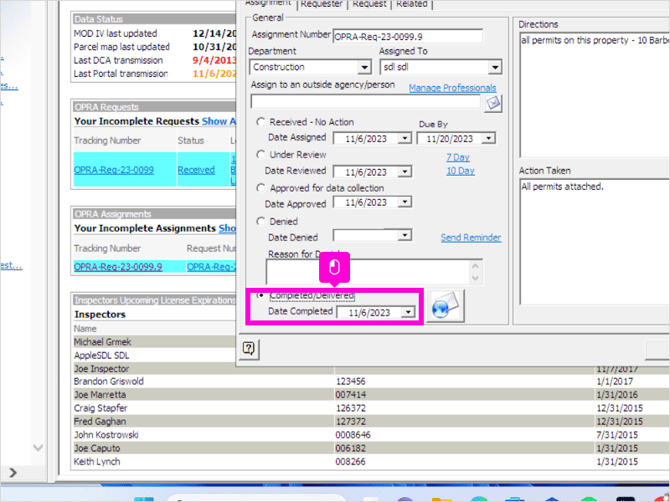
23. Toggle your assignment to completed / delivered, or Denied if applicable.
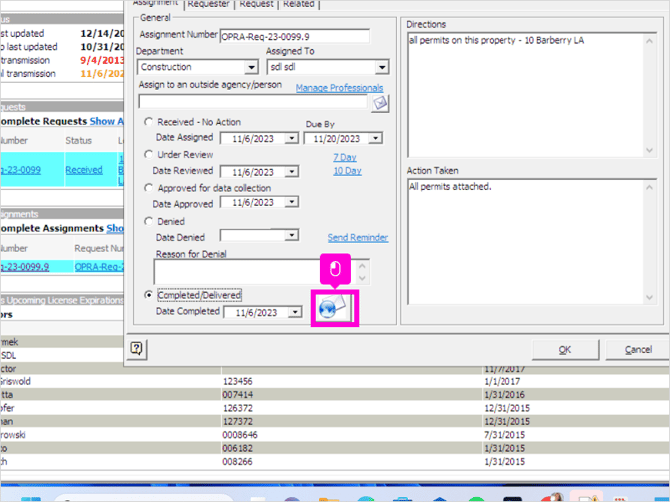
24. If you would like, you can also choose to send the OPRA custodian an email to alert them that your assignment is completed. (They will also see the update on their SDL Desktop Home Page).
25. Click OK to save and close your OPRA Assignment.
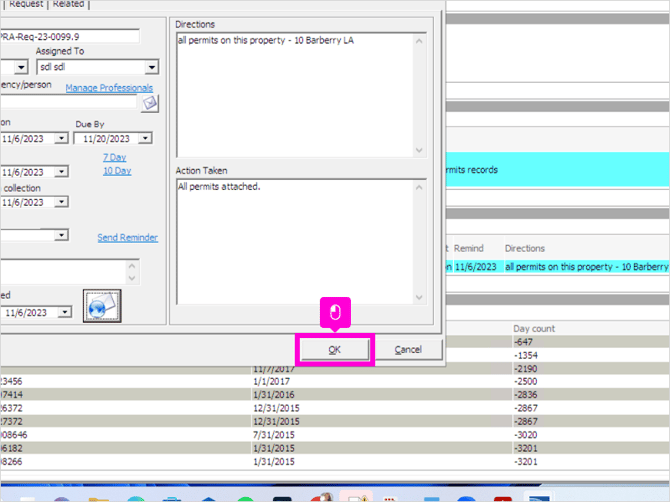
26. Your OPRA Assignment will disappear from your Home Screen Section. The OPRA Custodian will also be able to see that an Assignment on this OPRA Request has been completed, and how many other assignments remain open.
27. That's it. You're done.