If you use Edmunds software to manage your municipality's finances, this report is for you. Instead of manually re-entering payments that are already recorded in SDL Desktop, you can export them directly into a file ready for Edmunds import — saving your team time and eliminating double entry.
Getting Started
Make sure you have access to the module containing the payment data you want to export and that you know the date range for the report.
Step-by-Step Instructions
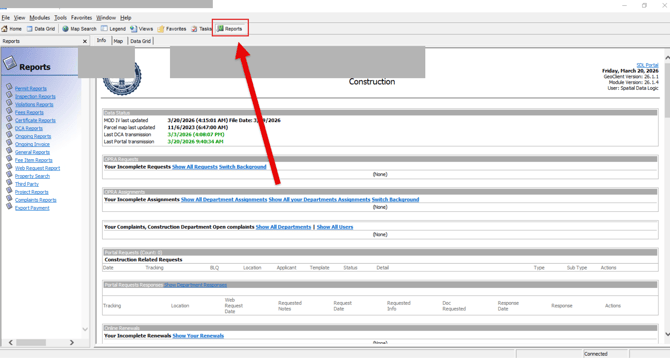
- Open the Report Menu — Head to the module you'd like to pull payments from and click the Reports menu at the top.
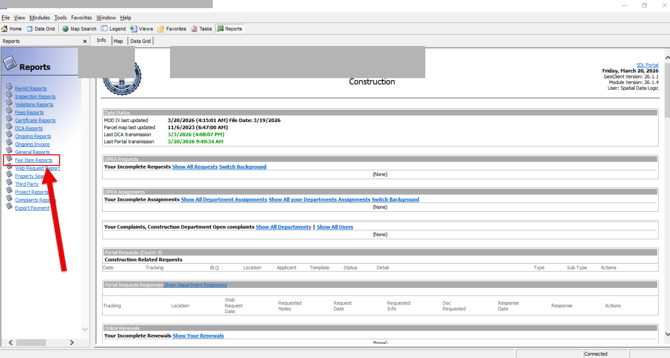
- Select "Fee Item Reports" from the left-hand Reports menu.
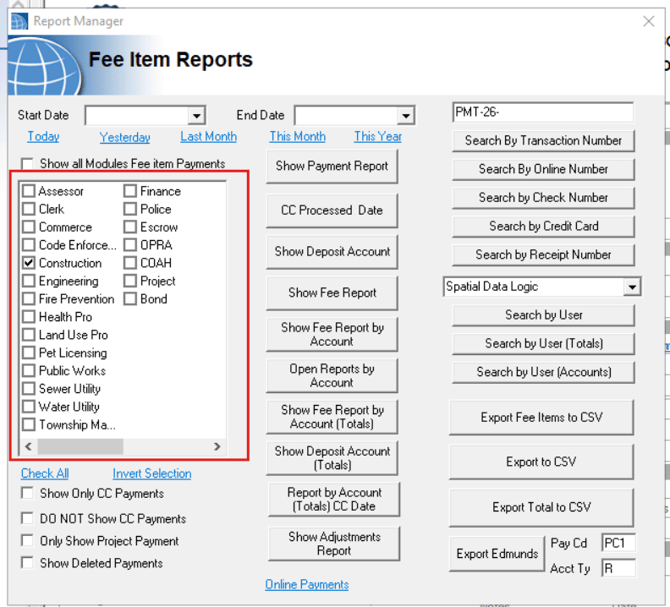
- Set Your Date Range — Pick the start and end dates for the payments you want to export.
💡Tip: The blue text shortcuts are a quick way to jump to common ranges like "This Month" or "Last Month" — no typing needed!

- Verify Module Selection — Take a quick look to make sure the right modules are checked off.
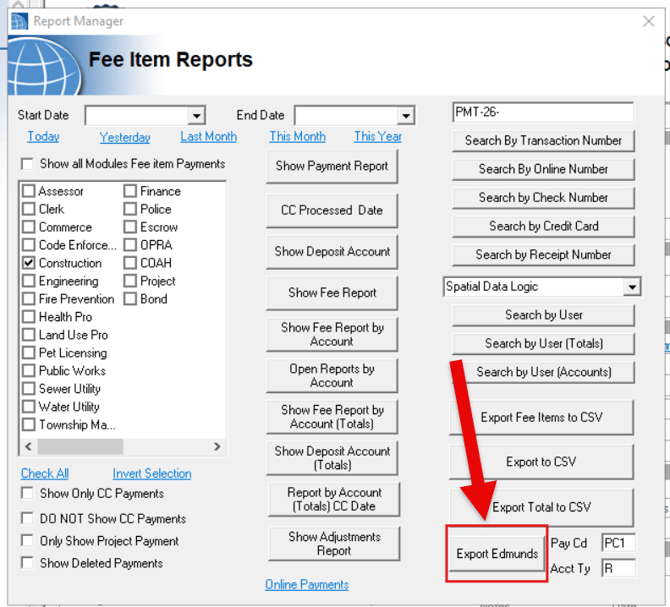
- Click the "Export Edmunds" button.
- Name Your File — You'll see a default file name ready to go. Feel free to change it to something that works for you — 🚨 just make sure it still ends in .csv so Edmunds can read it correctly.
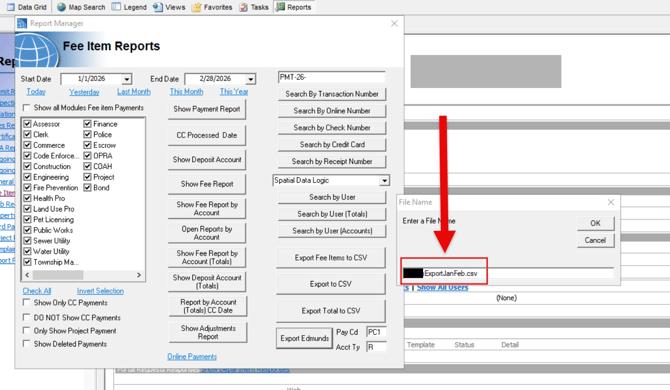
- Confirm the Delimiter — A small prompt will pop up about the delimiter character. No need to change anything here — just click OK.

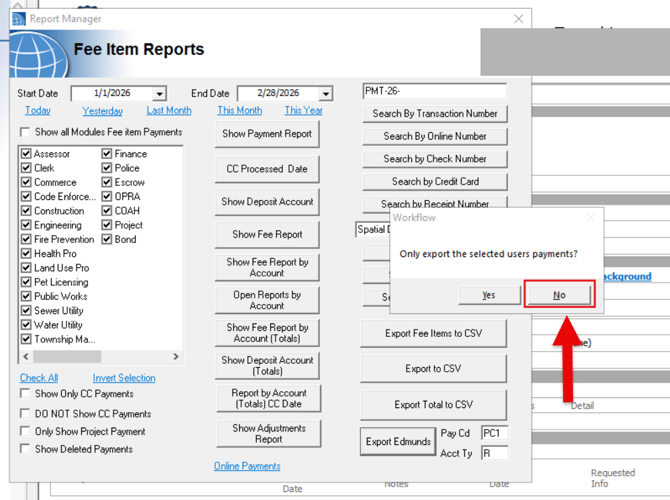
- Choose Payment Scope — You'll be asked if you want to limit the report to one user's payments. Click "No" to pull in all department payments, which is what you'll want for a full export.
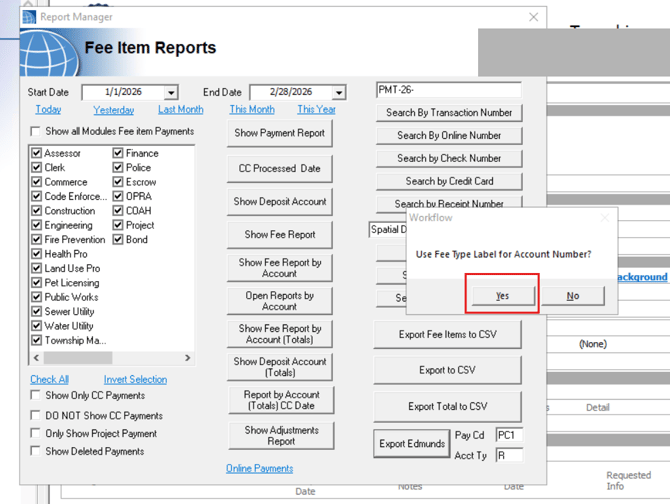
- Use Fee Type Label as Account Number — When the prompt comes up, select "Yes" to use the Fee Type Label as the Account Number in your export.
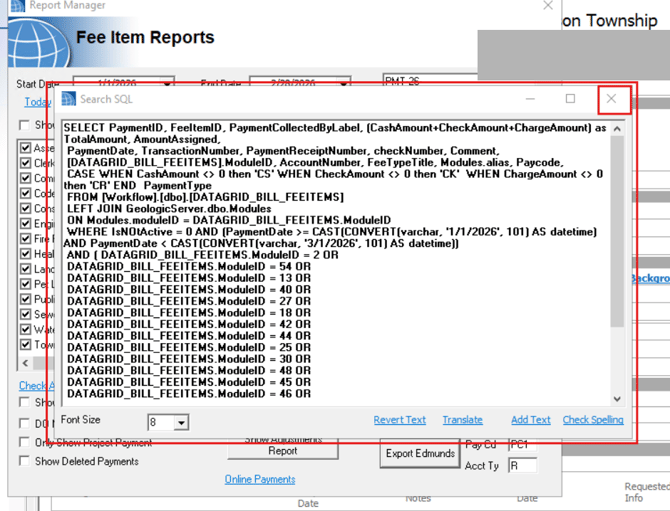
- Review the Data Preview — SDL Desktop will show you a quick preview of what's being pulled. Give it a look if you'd like, then click the X to close and move on.
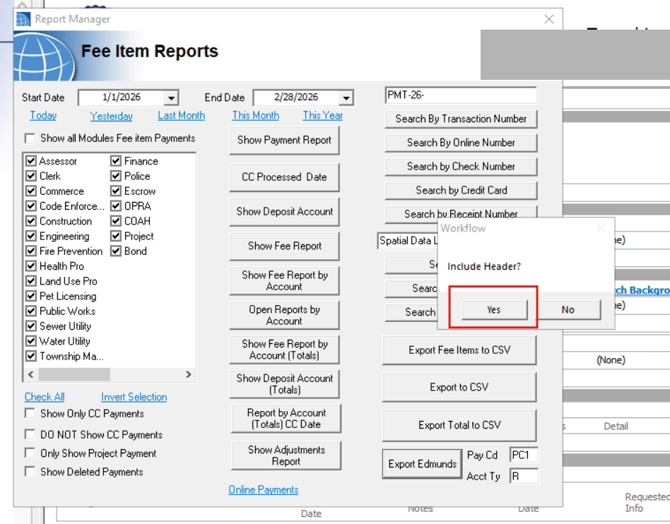
- Include Column Headers — You'll be asked if you want headers included in the file. We'd recommend saying "Yes" — it makes it much easier to verify the data the first time around.
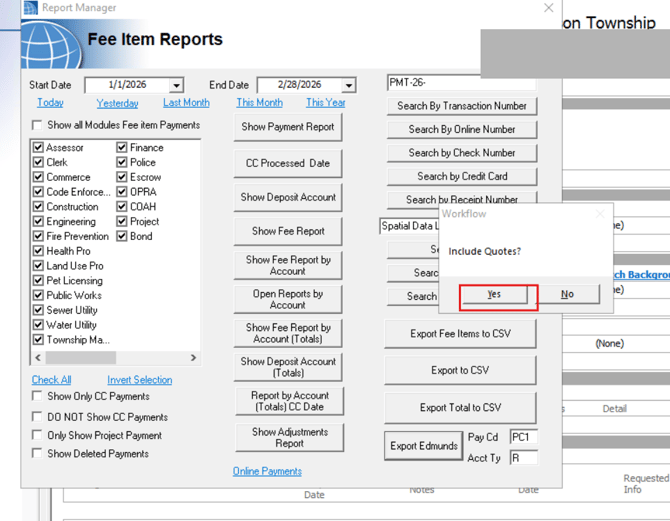
- Include Quotes — When asked about quotes in the report, go ahead and select "Yes".
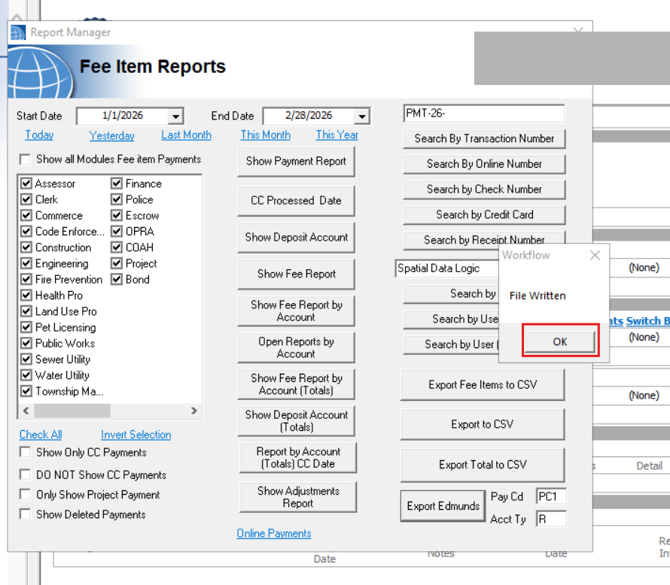
- Confirm Report Creation — You'll get a confirmation that the report was created successfully. Click OK and you're almost done!
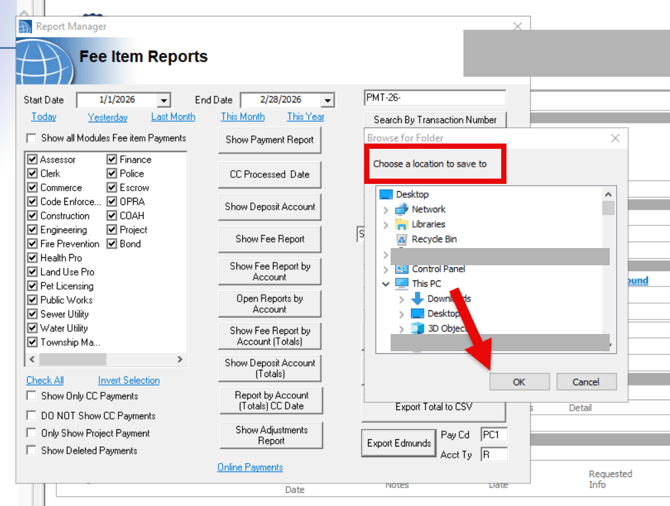
- Save the File — Choose where you'd like to save the file and click OK.
💡If you're a hosted/Parallels user, save to your C: drive under your own profile — same as you would with any other SDL Desktop export.
✅ Export Complete! Your .csv file is now ready to import into Edmunds.
⚡ Save these Quick Steps
-
Open Reports: Go to your module and click Reports > Fee Item Reports.
-
Filter: Set your Date Range and verify the Modules are checked.
-
Export: Click the Export Edmunds button.
-
Prompts: Follow this sequence:
-
File Name: Name it, ending in .csv.
-
Delimiter: Click OK.
-
Limit to one user? Select No.
-
Use Fee Type Label? Select Yes.
-
Include Headers? Select Yes.
-
Include Quotes? Select Yes.
-
-
Save: Close the preview (X) and save the file to your C: Drive.