![SDL - 2025 New Logo.png]](https://help.getsdl.com/hs-fs/hubfs/SDL%20-%202025%20New%20Logo.png?height=40&name=SDL%20-%202025%20New%20Logo.png)
1. Switch to the Fire Prevention module.
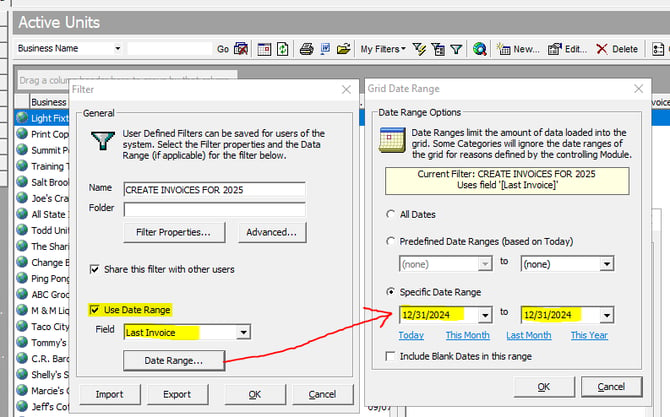
2. Go to the ‘Active Units’ data grid and create the filter with these settings:
- Name the filter with a quick description of what it does. This can be helpful when updating this for next year’s invoices.
- Check the box for ‘Use Date Range’ and select ‘Last Invoice’ in the date drop-down selection.
- Click on the ‘Date Range’ button and the ‘Grid Date Range’ window, use the ‘Specific Date Range’ option and set it to the expiration date of the latest invoice.
- For this example set the date range both to 12/31/2024 for only invoices that expired in 2024.
- If you want to include the previous year’s invoices, then the date range would be 12/31/2023 to 12/31/2024.
- Make sure the option to ‘Include Blank Dates’ in this range stays UNCHECKED, otherwise units with blank invoice dates will show.
- Click ‘OK’ when done to save and exit.
3. Back on the Filter window, click on the ‘Filter Properties’ button and enter what is highlighted and click ‘OK’ when done.
Note: To create a Fire Invoice, the unit requires either ‘Active Non-LHU’ or ‘Active Permit’, or both if available. We are adding the OR so if either is available, then it will be included in the results.
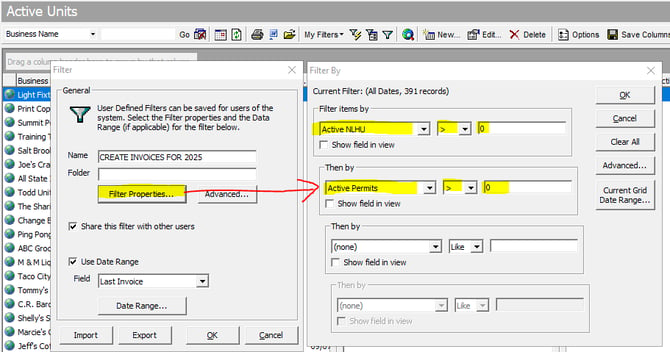
Please note that this filter is not complete until Step 4 is done!
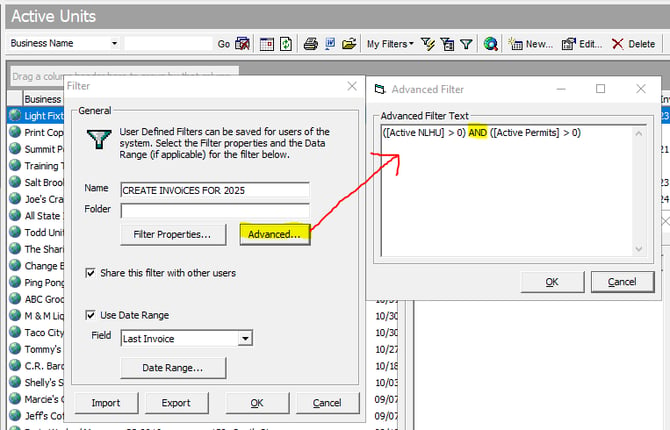
4. When done adding the Filter Properties, click on the ‘Advanced’ button. In the ‘Advanced Filter Text’ window, change the ‘AND’ to ‘OR’ and click ‘OK’. This will show units with either ‘Active Non-LHU’ or ‘Active Permit’. Click ‘OK’ on the Filter to save/exit. The filter is now done.
5. On the ‘Active Units’ data grid, make sure that the data grid bar with Active Units displayed is gray in color, then click on ‘My Filters’ and select the filter that you just created to apply it.
Note: If the data grid title bar is dark blue in color, it means that it already has a filter applied. You will need to remove this filter by clicking on the button with a globe and magnifying glass and then apply the filter that you created.

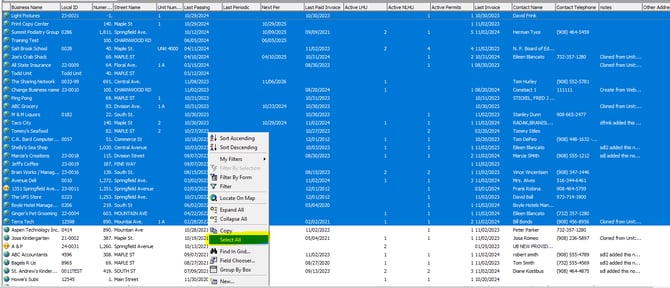
6. After the filter is applied, note how many records it shows at the top right of the screen and check with the customer. If they confirm that number is correct, then you can right-click any record in the data grid results and click on ‘Select All’ to select all of the records in the data grid results.
Note: You can hold the ‘CTRL’ key on the keyboard and left click on the records you want to deselect if you need to.
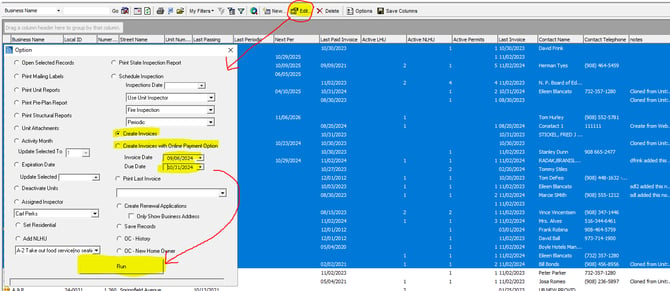
 7. After the records are selected, click on the ‘Edit’ button in the data grid bar and a menu will appear.
There are two different create invoice options, either:
Select ‘Create Invoice’ (with no CC link)
OR
Select ‘Create Invoices with Online Payment Option’ (this adds CC link to the invoice) and set the ‘Invoice Date’ and ‘Invoice Due Date’, then click ‘Run’. The CC link adds a URL to the invoice for the customer to pay with a credit card on a website. This option also requires online payments to be set up already in SDL Desktop.
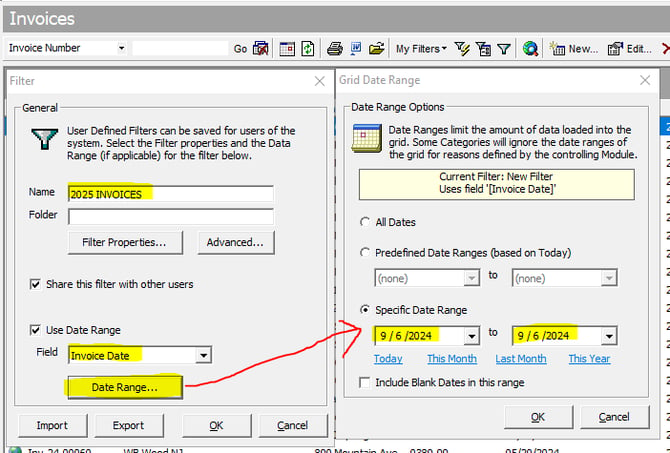
8. After the invoices are created, go to the Fire Prevention ‘Invoices’ data grid and create a new filter. Name the filter to indicate which year it is and set the ‘Invoice Date’ that was created in Step 7. Click ‘OK’ when done.
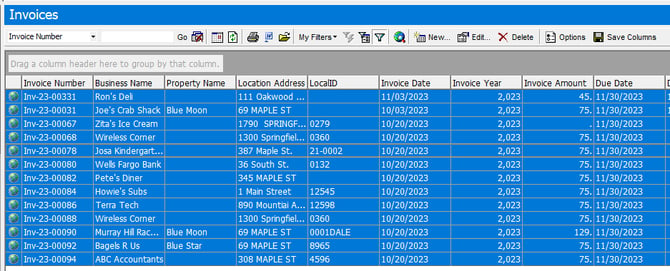
9. Click on ‘My Filters’ and select the filter you just created in Step 8. When the results show, right-click any record and click on ‘Select All’. This will select all records currently showing on the data grid. When done correctly, all records should be highlighted in dark blue.
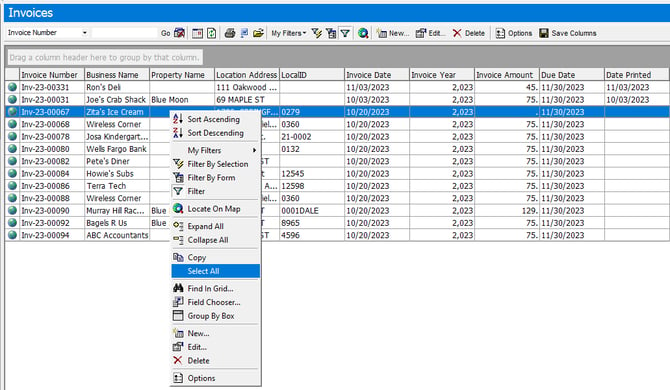
After Select All is clicked on you will see this.
 After the invoices are selected, next do the following:
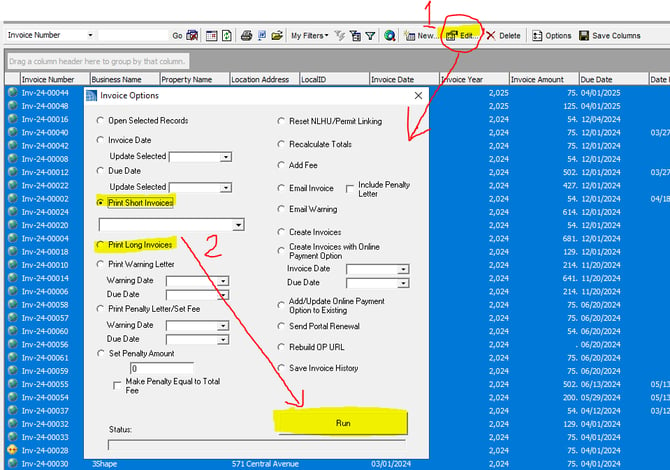
(1) Click the ‘Edit’ button in the data grid bar and the ‘Invoice Options’ menu will appear.
(2) Select either ‘Print Short Invoices’ (Quick, 1 page each) OR ‘Print Long Invoices’ (4 pages each).
Click the ‘Run’ button at the bottom right to start generating the print preview for Fire Invoices. The Status progress bar will be filled in blue. When done click ‘Yes’ on the print preview popup.
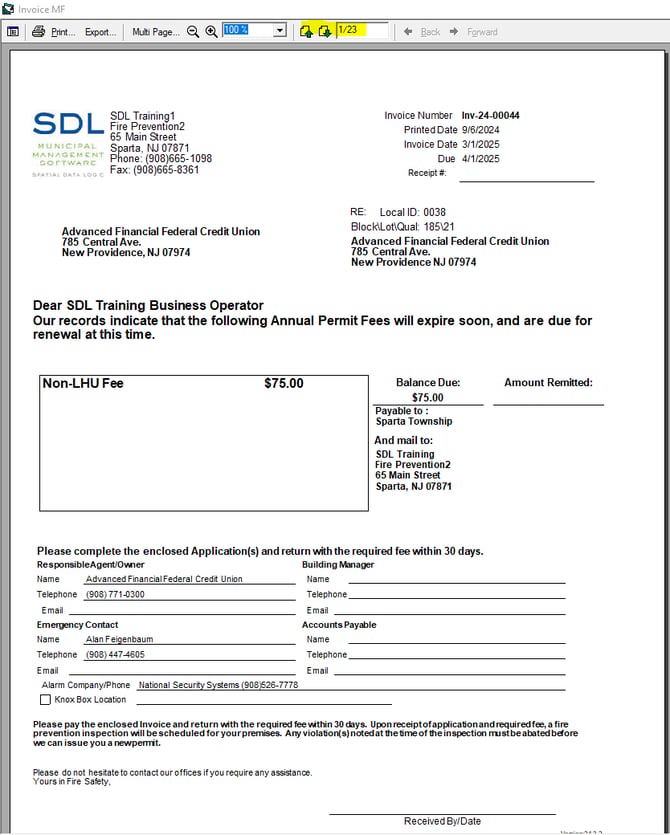
10. After the fire invoices are generated in the ‘Print Preview’ window, have the customer view them with the up and down arrows to see if they are correct before printing the hard copies.
11. After closing out the print preview window, two popups will appear one after the other. The first one will ask to add a printed date, click ‘Yes’ for this, so it will indicate on the ‘Invoices’ data grid which invoices have been printed. The second popup will ask if you want to add the invoices as an attachment. This is optional since clicking ‘Yes’ to this will take a long time depending on how many invoices they have.
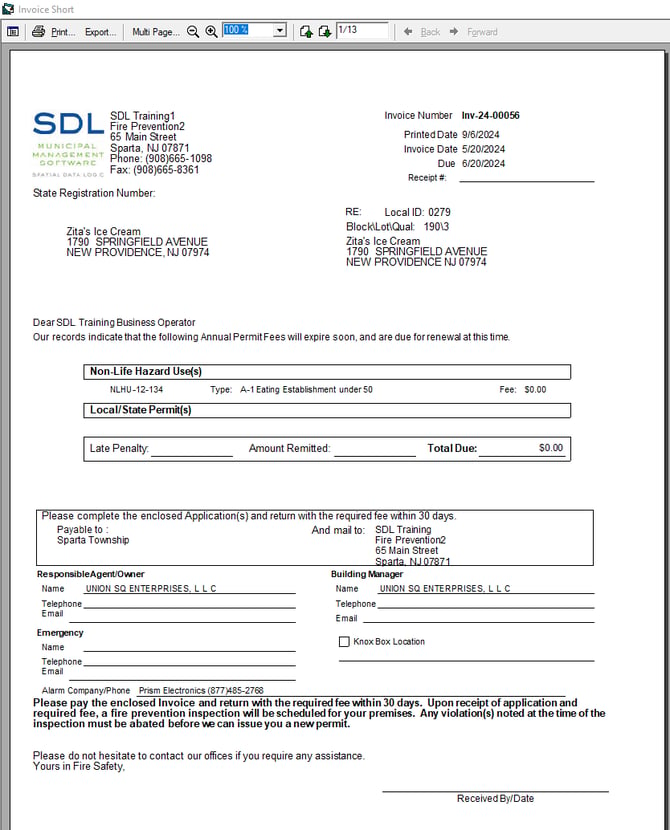
12. The last thing to point out is there are two types of fire invoices and they are controlled by the ‘Fire Prevention Options > Invoice’ tab, ‘Use Multi Fees’ checkbox.
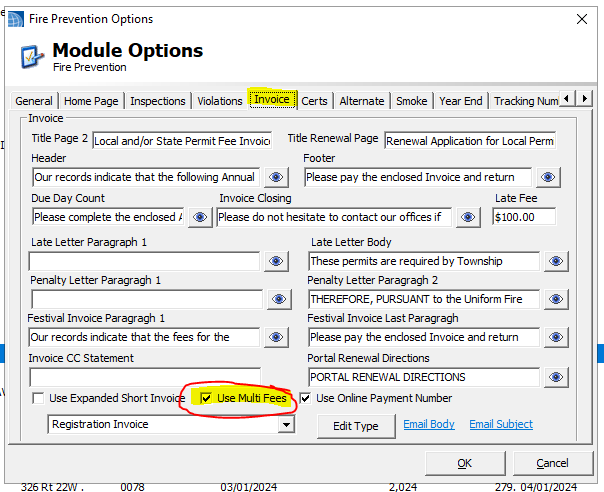
If ‘Use Multi Fees’ is checked, the short invoices and long fire invoices will look like this:
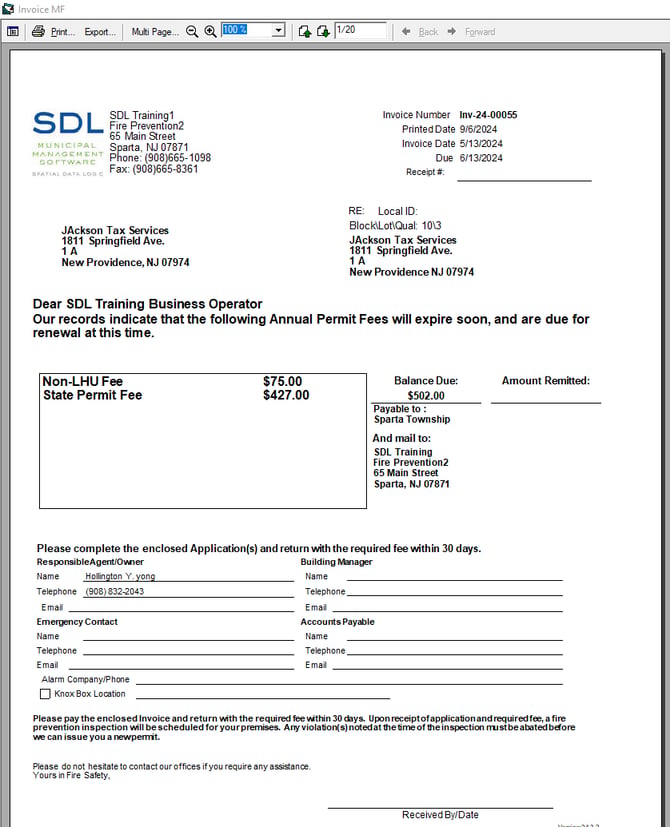
For the other fire invoice version with these settings:
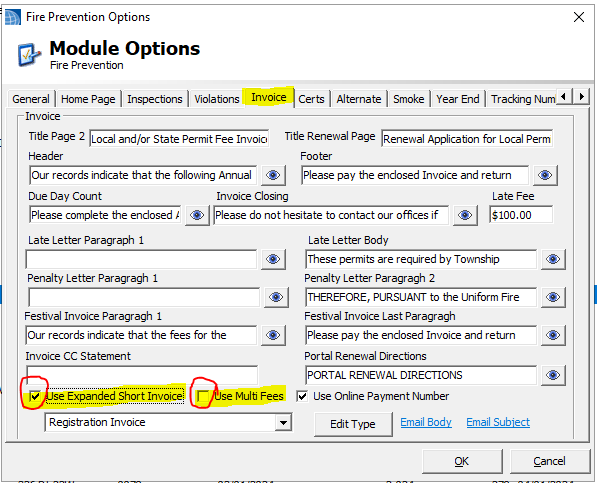
Note: If ‘Use Multi Fees’ is unchecked and the check box for ‘Use Expanded Short Invoice’ is checked.
If ‘Use Multi Fees’ is unchecked, the fire invoice will look different:
Tip: Please note, for the ‘Long Invoice’ option, do not select more than 20 records at a time, or else SDL Desktop may crash.
Each long invoice is four pages, so 20 x 4 = 80 pages. To fix SDL Desktop from crashing or hanging, you will have to close out the SDL Desktop program and restart it.