- Navigate to the ‘Property Registry’ data grid within Code Enforcement.
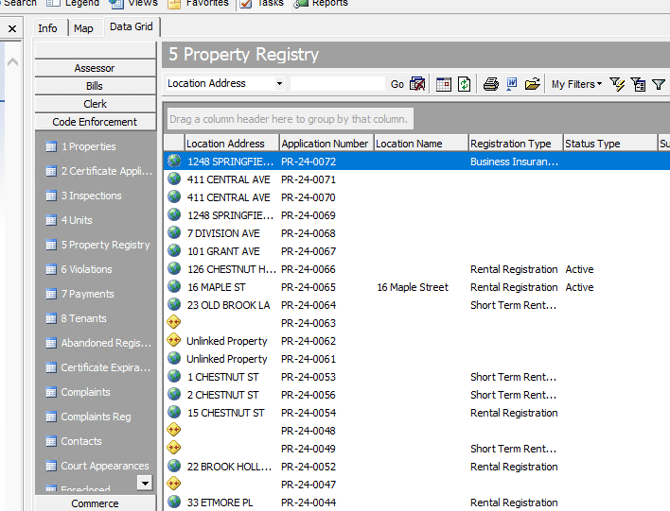
- Filter for expiring Rental Registrations. Select My Filters > Add New Filter. Name your filter.
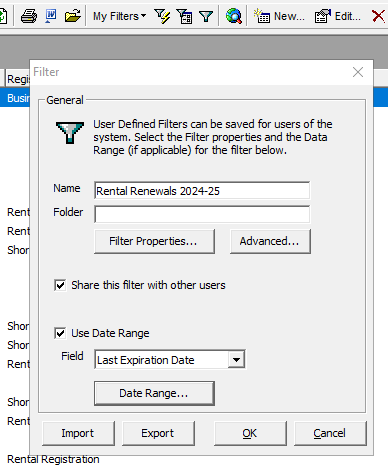
Within Filter Properties, set your ‘Registration Type’ equal to ‘Rental Registration’ or whatever the registration type is named in your town, then click OK. (If you are renewing all registration types, you can skip this step.)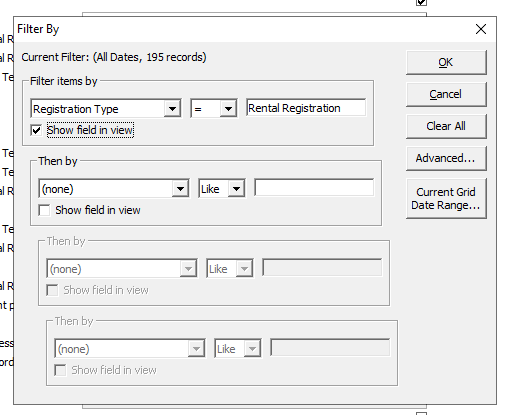
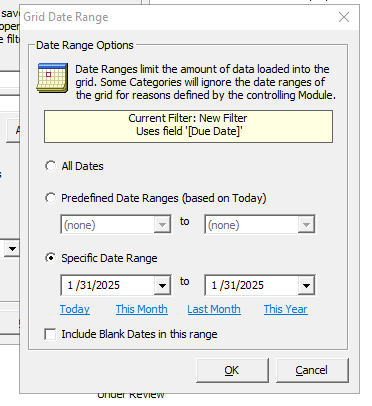
Check ‘Use Date Range’, select ‘Last Expiration Date’ from the ‘Field’ dropdown, select ‘Date Range’, select ‘Specific Date Range’, indicate the range of dates that your licenses expire and click OK. This may vary by town.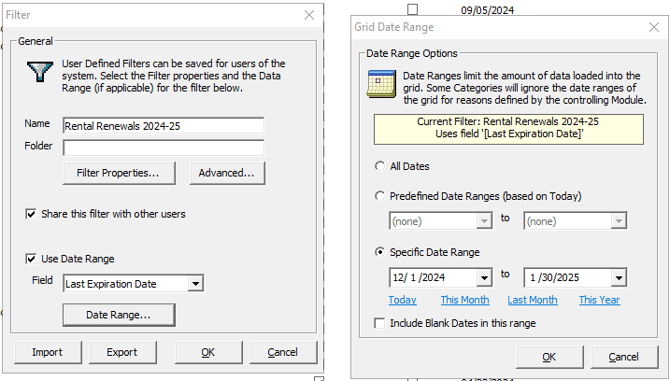
Once you click OK from the main filter window, it will close and the filter will be automatically applied. You can turn it off by selecting the filter icon from the top bar. You can reapply the filter by clicking on it within ‘My Filters’.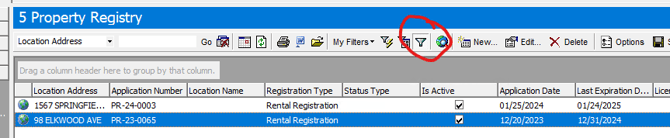
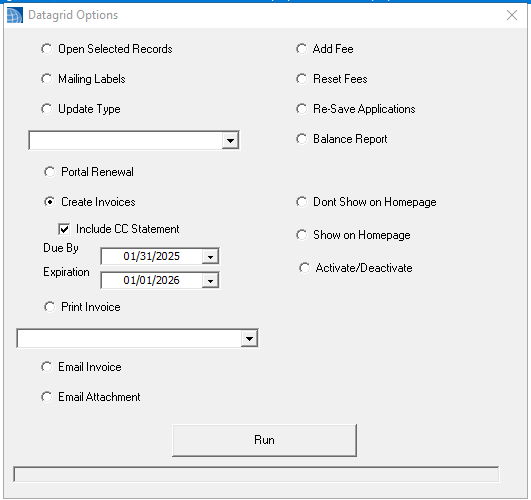
- Select all results. You can do so by holding ‘Shift’ and clicking the first result and the last result, then select ‘Edit’. Next, select ‘Create Invoices’ and fill out the ‘Due By’ and ‘Expiration’ dates. If you would like to allow online payments, check the ‘Include CC Statement’ box. Then click ‘Run’ and select ‘Yes’ at the prompt.
- Lastly, switch to the ‘Property Registry License’ data grid.
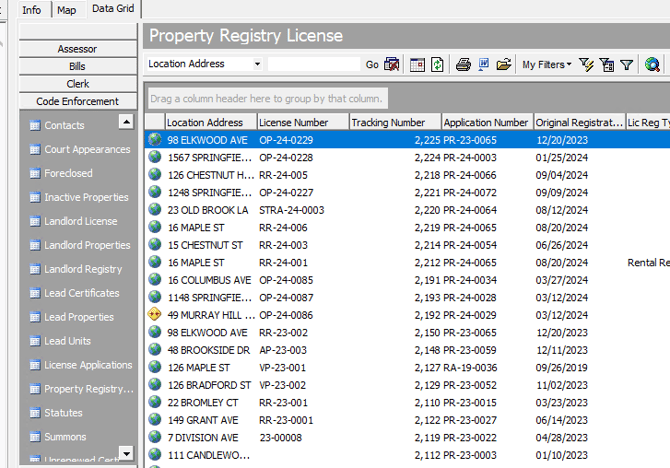
We will now create a filter here to find the newly created licenses/invoices. We will once again go to ‘My Filters’ and ‘Add New Filter’. Name the filter. Go into ‘Filter Properties’ and select ‘Registry Type’ and set it equal to ‘Rental Registration’ (or whatever you have it named). This once again only applies if you are renewing one Registry Type. Then click OK and check off ‘Use Date Range’, select ‘Due Date’ from the ‘Field’ dropdown, and set the ‘Date Range’ to the date you set when creating the new invoices and click OK. Then click OK again to save and apply the filter.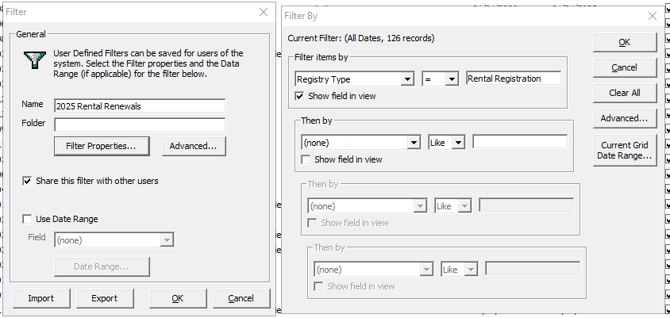
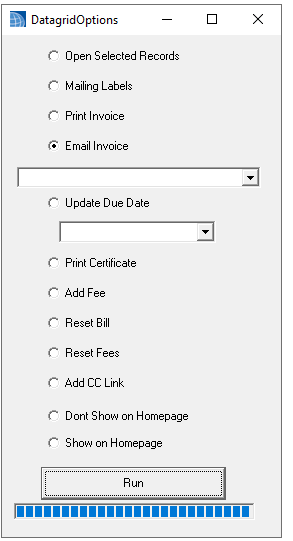
Once again, you will select all results and then select ‘Edit’. Then you can print the invoices by selecting ‘Print Invoice’ and ‘Run’. You will be prompted with an option to preview the invoices or just send them right to the printer. You can also email the invoices, print mailing labels, and add fees to the invoices from here.
English
![SDL - 2025 New Logo.png]](https://help.getsdl.com/hs-fs/hubfs/SDL%20-%202025%20New%20Logo.png?height=40&name=SDL%20-%202025%20New%20Logo.png)