![SDL - 2025 New Logo.png]](https://help.getsdl.com/hs-fs/hubfs/SDL%20-%202025%20New%20Logo.png?height=40&name=SDL%20-%202025%20New%20Logo.png)
A. Municipal Staff
1. Generate your renewal letters and any available portal marketing, and send out to the properties in your registry.
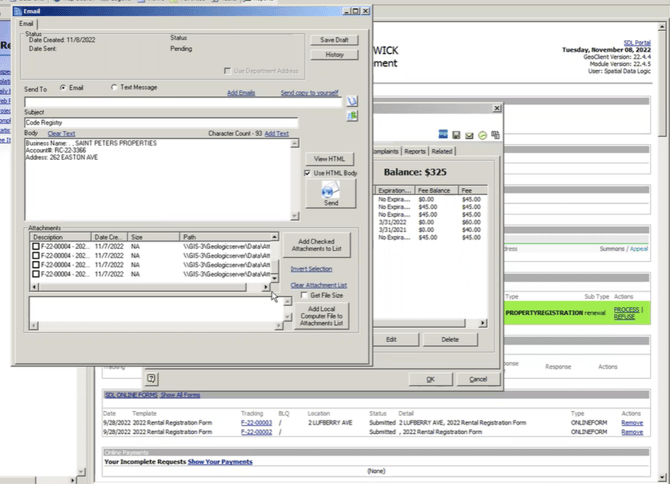
2. You can generate the mailing labels from your existing property registrations in SDL Desktop by highlighting those registrations and selecting edit.
3. You can also highlight and hit edit to email a Portal Renewal prompt to existing property registrations, given they have an email address on file.
-png.png?width=670&height=524&name=mceclip0%20(3)-png.png)
B. Citizens:
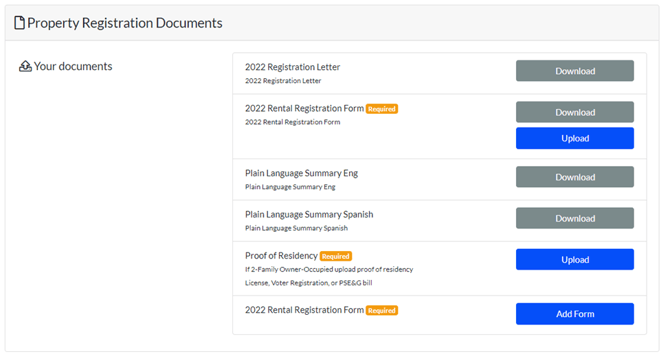
1. Citizens will visit the SDL Portal to submit their new property registration request, or their renewal request.
2. Users will complete all required fields, attach any required uploads, and complete any supplemental forms added to the registration request.
C. Municipal Staff
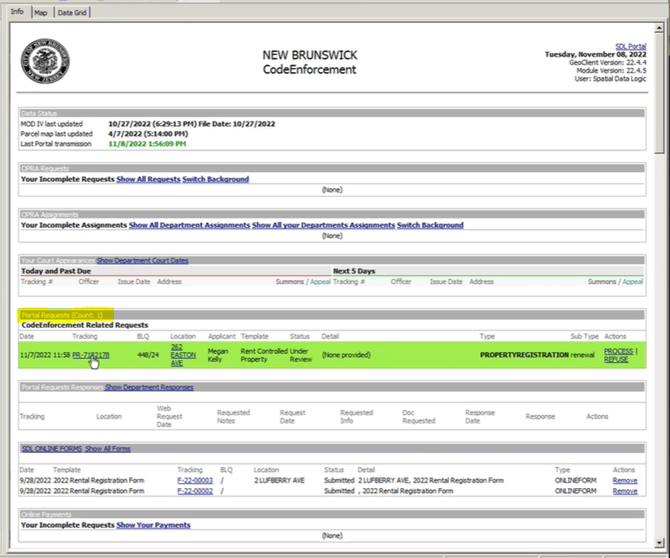
1. When registrations and renewals are submitted, they will show up on your SDL Desktop home page, under the “Portal Requests” section.
2. Click the tracking number of the request to preview the supporting documentation
3. Once you’ve opened the Portal request, go to the Related tab and click the magnifying glass icon at the bottom. This will allow you to preview the uploaded documents and completed SDL Forms.
-png.png?width=667&height=533&name=image%20(44)-png.png)
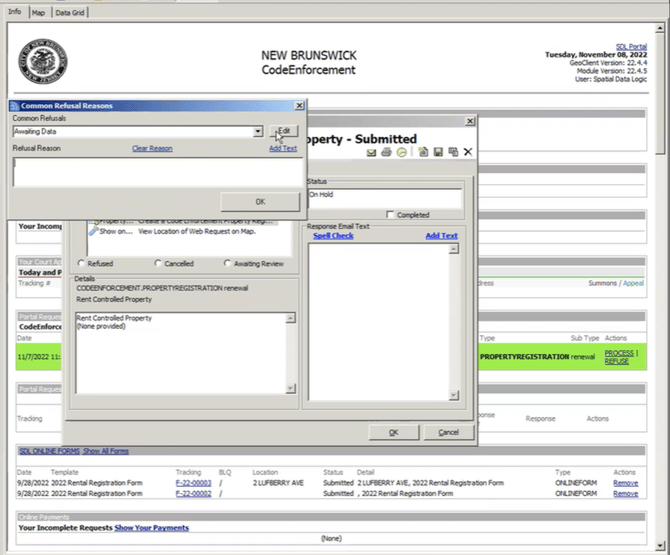
4. If the documents are not correct, or something is missing, go back to the portal request record, find the "status" tab, and switch the status to "On Hold".
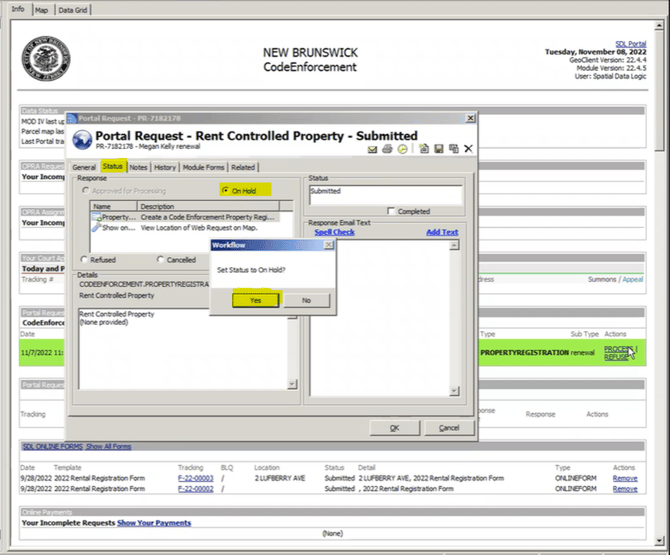
5. You'll be prompted to set a refusal reason.
6. Navigate to the Notes tab. Here you can request additional information from the applicant. Type out what you need from them in the “Request Additional Information” text box. Be sure to check “Request Documents” if they will need to attach anything to the response. Then click “Request Additional Information”.
-png.png?width=667&height=533&name=image%20(46)-png.png)
Note you can also add saved text values using the add text link, this could include links to your website or the SDL Online Forms.
-png.png?width=670&height=490&name=image%20(45)-png.png)
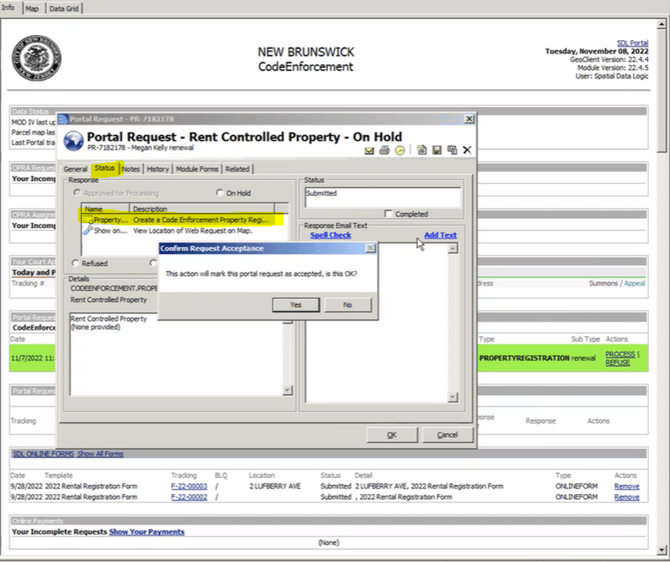
7. If you do not need any additional information, you will go back to the “status” tab and double click on the first line item titled “Create a Code Enforcement Property Registration…”
8. If a record was submitted as a new registration, you can confirm that there is not already an existing registry record by searching in your property registries.
-png.png?width=421&height=602&name=image%20(47)-png.png)
9. If a registration for this property already exists, you can merge the submitted record into your existing record by selecting the registry and hitting OK.
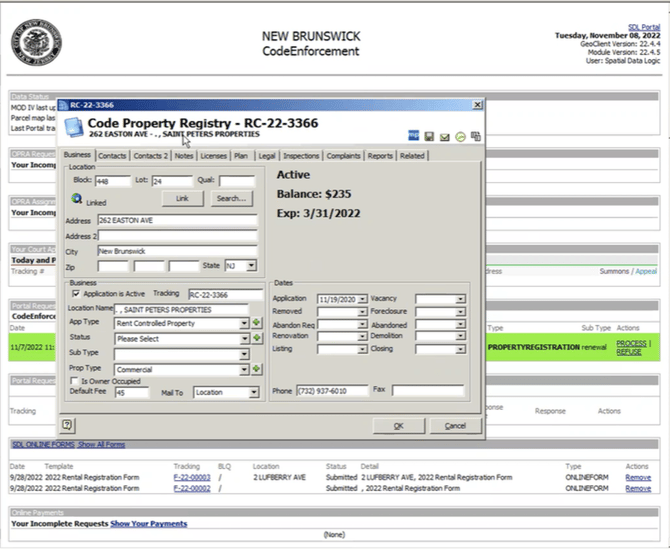
10. Whether you processed a new registration, renewal, or merged an application with an existing property, you will next be brought to your Property Registration record.
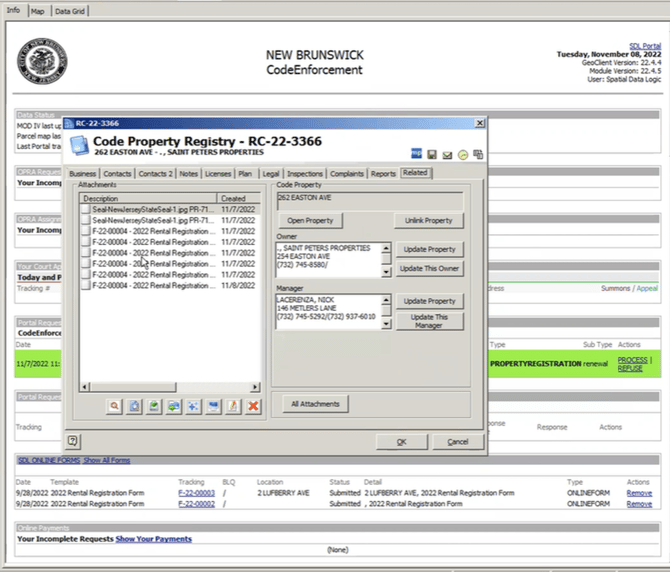
11. In the related tab, you will find all of the documents you just reviewed.
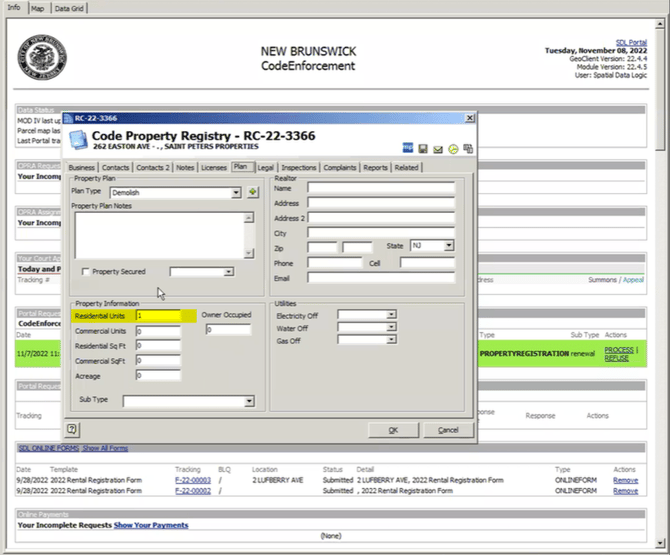
12. In cases of Rent Control registrations, you will navigate to the "Plan" tab, in order to see the number of units you're charging against. This Unit Count will be the number used to calculate the Per unit charge for the year's registration fee. (Users will need to set up a specific fee type to utilize this feature if they have not already done so).
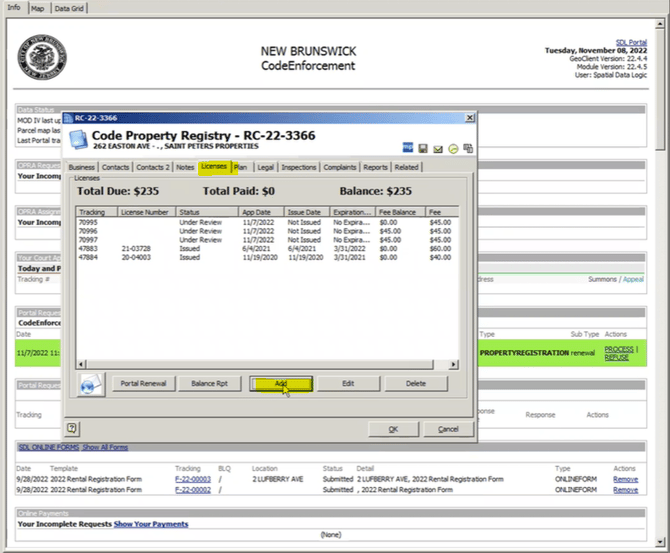
13. Go to the License tab. Here, you will see all previous licenses and payments, along with any outstanding balance. Hit Add to create a new license. Note, you will need to click edit for each outstanding balance you would like to create a credit card payment request or print an invoice for.
14. In the license, you can set the payment due date and preview the fee. When you hit the online payment button, the email address on file will be sent a secure link to pay for their license. You can also generate a hard copy invoice by selecting the invoice button.
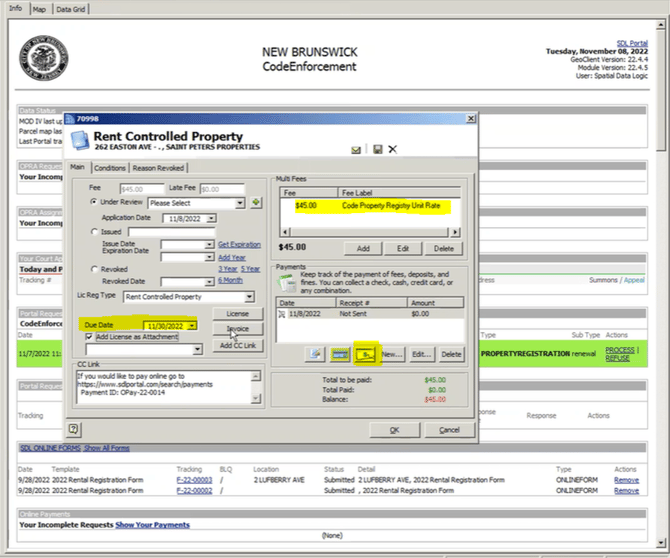
15. When and if you're ready to generate a license, you can use the same screen to select "issued" from the left radio button option, then fill in the issue date and expiration date. The expiration date is critical, so that users can tell which licenses and properties may need payment down the road. Hitting the license button will generate the license report.
16. When you're done working in the license, hit OK to save and close. Back on the Property Registration, you can use the email button to email any attachments to the record holder.