![SDL - 2025 New Logo.png]](https://help.getsdl.com/hs-fs/hubfs/SDL%20-%202025%20New%20Logo.png?height=40&name=SDL%20-%202025%20New%20Logo.png)
Tenancy Management
CCOs, Rental, Re-rental, Change of Tenant, Change of Owner: these can go by many different names, but in most cases, describes the inspection process and fee collection that takes place when a landlord rents an apartment (residence). In SDL Desktop, this process is done in the Code Enforcement Module. Below, we have provided a quick guide to show users the basic process. There are a number of ways to complete the pieces of this process, and additional information available to track, but starting with the information in this guide will help users get used to this process, before they need to consider our other features.
Property Datagrid Category
The Datagrid is the main workhorse for many Desktop users. To start off, we recommend using the Properties DGC under Code Enforcement.
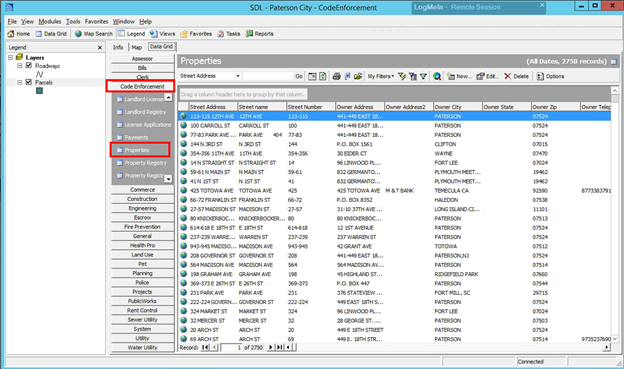
Property Search
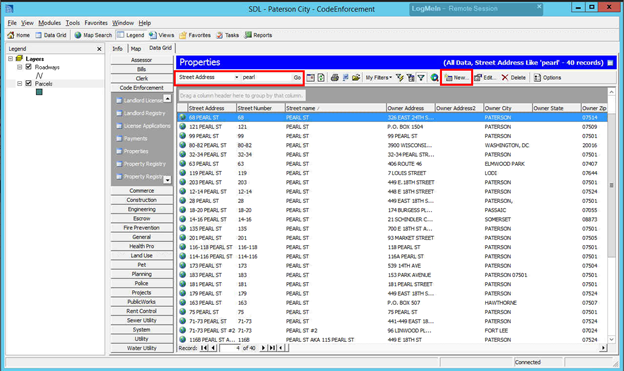
Enter an address in the box next to Street Address and hit enter or the Go button. This will filter the Datagrid based on the value you entered. In general for the search values you enter, remember less is more. You don't need to include the street suffix, as only the exact character match will return with the results. Even a street number isn't always needed, depending on the street. The primary intention should be to get the returned list down to a readable amount. You then double click on the Property you're looking for. If you don't see the Property, hit the New Button to create a New Property.
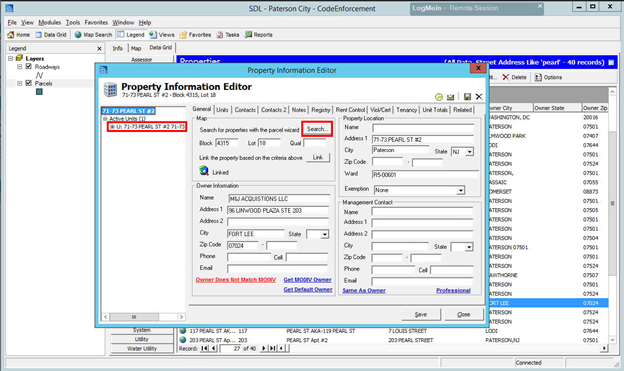
Property Information Editor
The records in the Datagrid will open up the Property Information Editor. On the left is a tree view for navigation, that can hold one or many Units (Apartments). If you click on the individual unit, you will be brought to the Unit Editor. If this is a new property, you can click Search to find the tax information for the applicant's address, or manually enter the information on the right.
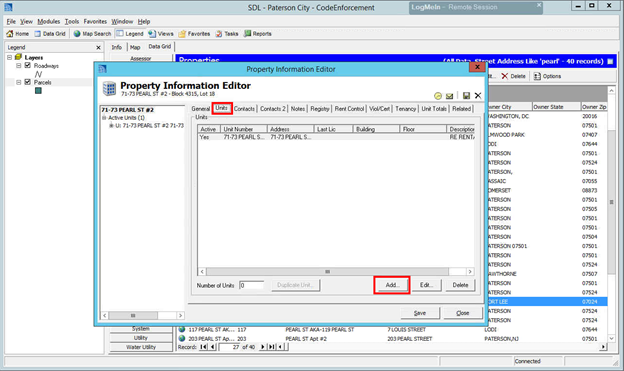
If you don't see the Unit Number (Apartment Number) go to the Units Tab and click Add. The new Unit will show on the left, and you will now be able to click on it.
Unit Editor
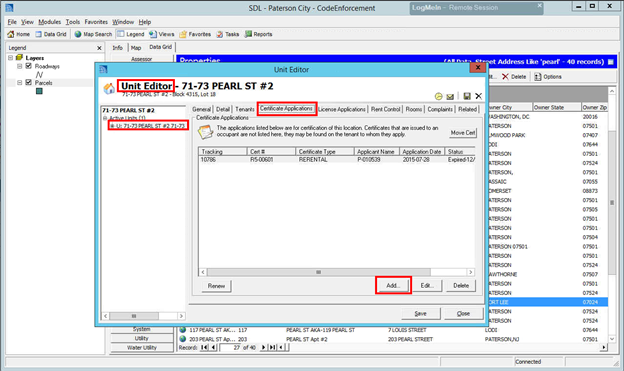
When clicking on the unit in the tree view, the Unit Editor will open. Note the header name changes. If this is a new Unit, fill in the Unit number on the General Tab. Click on the Certificates tab and click Add.
Certificate Application
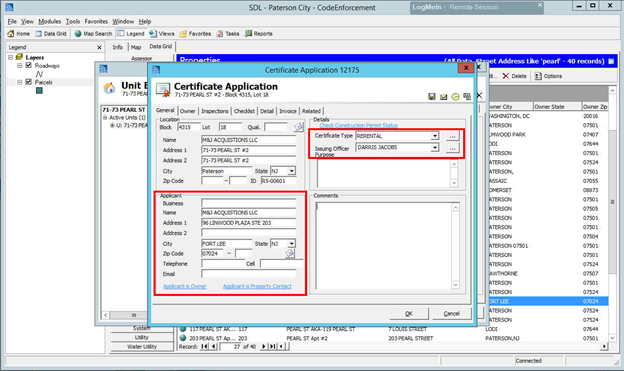
The certificate Application is where you will schedule the inspection, take in your fee and issue/print your Certificate. In the General Tab, set your Certificate Type and Issuing Officer, and add any applicant information you need.
Schedule Inspection
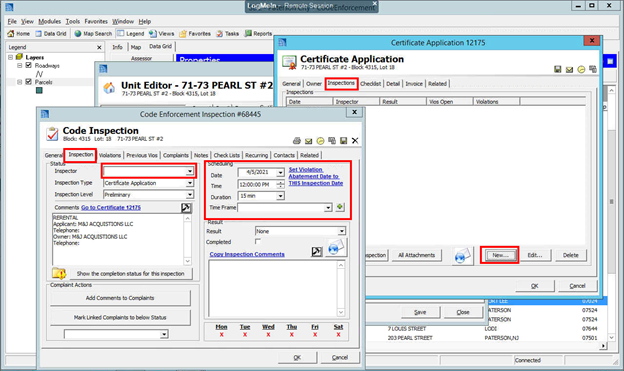
In the Inspections Tab, click New and on the Inspection Form. Once this opens, go to the Inspections Tab. Pick the Inspector and Date that you want to schedule the inspection.
Payment
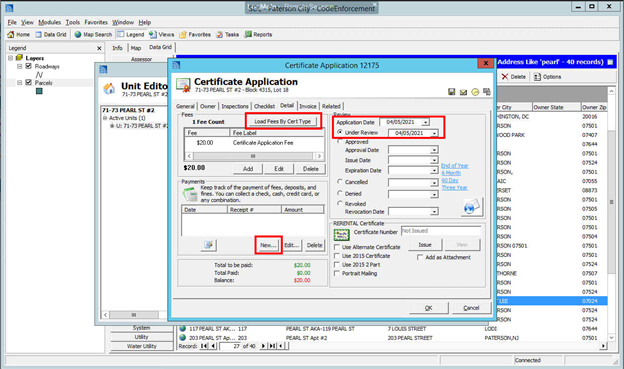
Back in the Certificate Application window, go to the Detail Tab. Click Load Fees by Cert Type. After the fees are loaded, you can click edit if you need to adjust the them. If nothing shows up, call support so they can assist you with setting up the defaults. After the payment is received, click New in the Payments section, and add the payment info. Now you can wait until the Inspection is completed and Passed.
Issuance
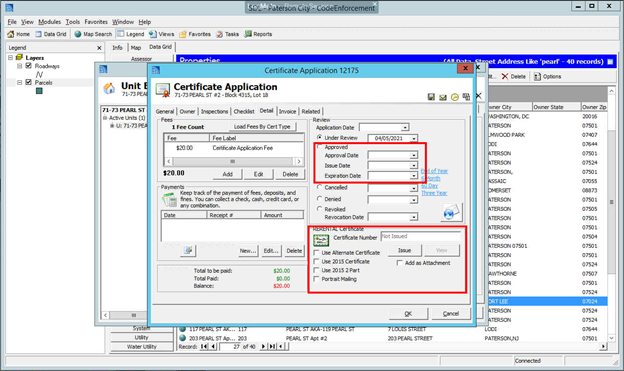
Once the Inspection is Completed and Passed, you mark the certificate as Approved, enter the dates and click Issue at the bottom. Over the years, we have added several options for the certificates, so make sure you check off which print option your town is using. Click View to print.
Things to consider after you are comfortable with this process
- Many town now use a digital signature and email the certificate to the applicant. Please contact support if you are interested in adding the digital signature feature.
- Turn on the Certificate Request on your SDL Portal page. This will allow the applicant to submit the request online and will take a lot of the data entry out of the process, including the creation of Properties and Units.