![SDL - 2025 New Logo.png]](https://help.getsdl.com/hs-fs/hubfs/SDL%20-%202025%20New%20Logo.png?height=40&name=SDL%20-%202025%20New%20Logo.png)
1. The first step is to go to SDLPortal.com and login using your SDL Desktop username and password.
-png-1.png?width=670&height=503&name=1_800x600_z-undefined_mz-0-5_mi-1_ti-0_ar-1_cr-0_si-0_fr-0_tb-1_t-_ftc-_ftb-_mc-_mfc-_complete%20(1)-png-1.png)
2. Make sure to check "Sign in with a municipal employee account", search for your municipality, and select.
-png-1.png?width=670&height=503&name=2_800x600_z-undefined_mz-0-5_mi-1_ti-0_ar-1_cr-0_si-0_fr-0_tb-1_t-_ftc-_ftb-_mc-_mfc-_complete%20(1)-png-1.png)
3. Once you're brought to the SDL Portal homepage, click the account button in the upper right hand corner.
-png-1.png?width=670&height=503&name=3_800x600_z-undefined_mz-0-5_mi-1_ti-0_ar-1_cr-0_si-0_fr-0_tb-1_t-_ftc-_ftb-_mc-_mfc-_complete%20(1)-png-1.png)
4. Click Town Admin.
Please note you will need to be an SDL Portal Admin to access this button. If you are not set up as a Portal Admin, contact your SDL Admin.
-png-1.png?width=670&height=503&name=4_800x600_z-undefined_mz-0-5_mi-1_ti-0_ar-1_cr-0_si-0_fr-0_tb-1_t-_ftc-_ftb-_mc-_mfc-_complete%20(1)-png-1.png)
5. Click Web Requests
-png-1.png?width=670&height=503&name=5_800x600_z-undefined_mz-0-5_mi-1_ti-0_ar-1_cr-0_si-0_fr-0_tb-1_t-_ftc-_ftb-_mc-_mfc-_complete%20(1)-png-1.png)
6. Click Clerk Dept Applications
-png-1.png?width=670&height=503&name=6_800x600_z-undefined_mz-0-5_mi-1_ti-0_ar-1_cr-0_si-0_fr-0_tb-1_t-_ftc-_ftb-_mc-_mfc-_complete%20(1)-png-1.png)
7. The Request settings tab will be applied to all of your Clerk Department Templates.
-png-1.png?width=670&height=503&name=7_800x600_z-undefined_mz-0-5_mi-1_ti-0_ar-1_cr-0_si-0_fr-0_tb-1_t-_ftc-_ftb-_mc-_mfc-_complete%20(1)-png-1.png)
8. Allow SDL Geologic Users Access will enable the template for SDL municipal users to access and submit. This can be used for internal review and testing.
-png-1.png?width=670&height=503&name=8_800x600_z-undefined_mz-0-5_mi-1_ti-0_ar-1_cr-0_si-0_fr-0_tb-1_t-_ftc-_ftb-_mc-_mfc-_complete%20(1)-png-1.png)
9. Public Account Access will turn the request on for public users.
Allow Unregistered Access will allow users to submit the application without creating an SDL Portal public account.
-png-1.png?width=670&height=503&name=9_800x600_z-undefined_mz-0-5_mi-1_ti-0_ar-1_cr-0_si-0_fr-0_tb-1_t-_ftc-_ftb-_mc-_mfc-_complete%20(1)-png-1.png)
10. If you would like to receive email notifications for submissions, enter your email address here.
-png-1.png?width=670&height=503&name=10_800x600_z-undefined_mz-0-5_mi-1_ti-0_ar-1_cr-0_si-0_fr-0_tb-1_t-_ftc-_ftb-_mc-_mfc-_complete%20(1)-png-1.png)
11. Click Display on Home Page to put a link to this application on the SDL Portal Home Page.
Click Display on Requests Page to put a link to the application on the main Request Page of the Portal.
-png-1.png?width=670&height=503&name=11_800x600_z-undefined_mz-0-5_mi-1_ti-0_ar-1_cr-0_si-0_fr-0_tb-1_t-_ftc-_ftb-_mc-_mfc-_complete%20(1)-png-1.png)
12. IF you need the Portal Link or Embedded iFrame for your town website, you can access them here.
-png-1.png?width=670&height=503&name=12_800x600_z-undefined_mz-0-5_mi-1_ti-0_ar-1_cr-0_si-0_fr-0_tb-1_t-_ftc-_ftb-_mc-_mfc-_complete%20(1)-png-1.png)
13. If you would like to give the request a custom Label, button text, and description you can do so here.
-png-1.png?width=670&height=503&name=13_800x600_z-undefined_mz-0-5_mi-1_ti-0_ar-1_cr-0_si-0_fr-0_tb-1_t-_ftc-_ftb-_mc-_mfc-_complete%20(1)-png-1.png)
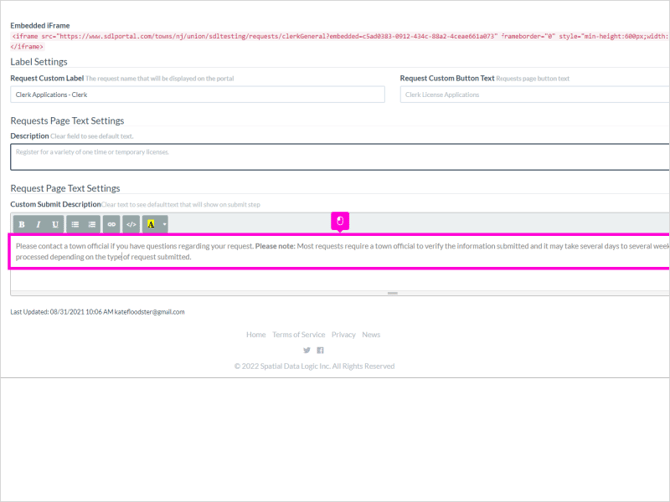
14. The custom submit description will be displayed at the end of the request, before the applicant submits.
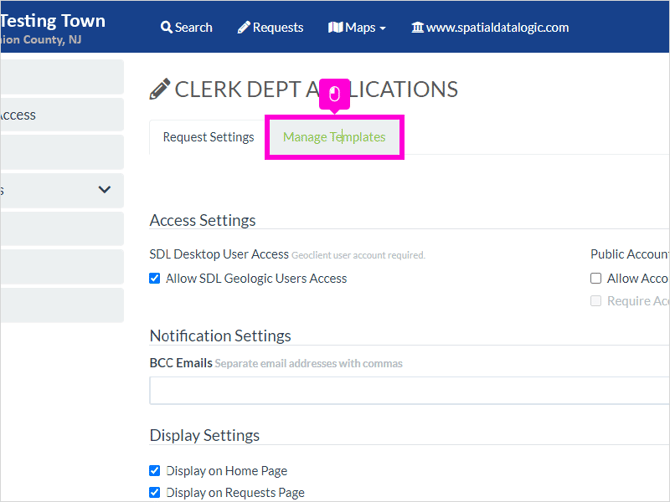
15. Scroll up and click Manage Templates to further customize your different application types.
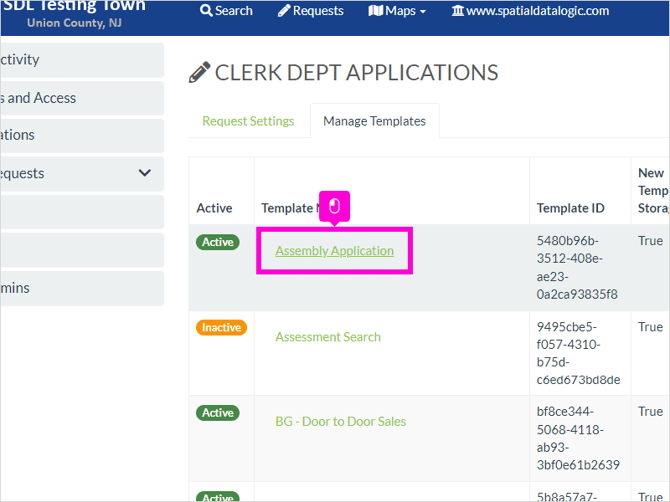
16. Select the Application Type that you would like to set up. These types will sync up from the application types you have created in the SDL Desktop, under the Clerk Application datagrid.
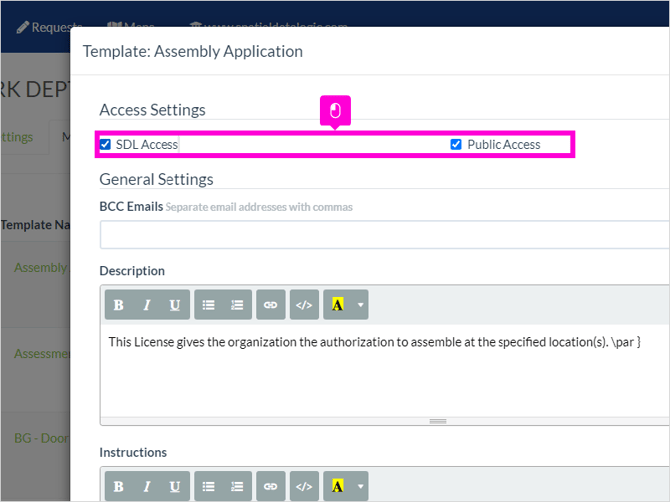
17. Click SDL Access to turn the template on for municipal users. Click Public Access to make the template live. *Note: if you turn the main request on, you must have at least one template turned on as well.
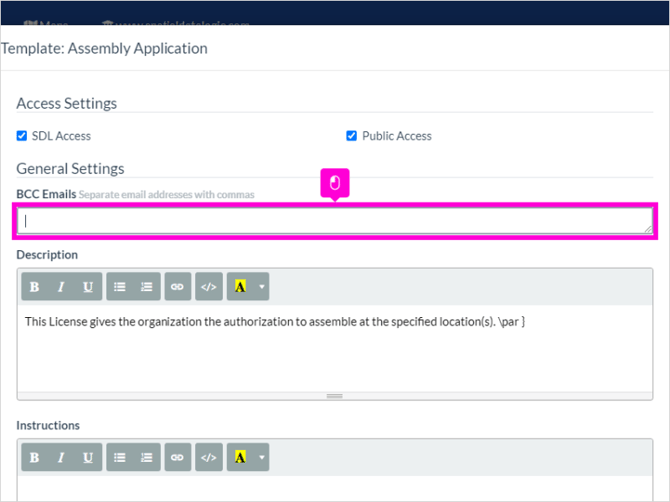
18. If you would like to receive email notifications for ONLY this template, and not ALL templates, you can enter the email address here, instead of on the Request Settings Tab.
19. If you have a custom description or instructions for the request you can include it here, and it will display at the top of the application. Notice the multiple formatting and linking options available.
-png.png?width=670&height=503&name=19_800x600_z-undefined_mz-0-5_mi-1_ti-0_ar-1_cr-0_si-0_fr-0_tb-1_t-_ftc-_ftb-_mc-_mfc-_complete%20(1)-png.png)
20. If you would like to allow applicants to include any general attachments, you can turn this on here. Instructional text for these uploads can also be added here.
-png.png?width=670&height=503&name=20_800x600_z-undefined_mz-0-5_mi-1_ti-0_ar-1_cr-0_si-0_fr-0_tb-1_t-_ftc-_ftb-_mc-_mfc-_complete%20(1)-png.png)
21. The clerk general application has a number of additional fields you can choose to enable. These include property owner information, and a start and end date. You can also require these fields.
-png.png?width=670&height=503&name=21_800x600_z-undefined_mz-0-5_mi-1_ti-0_ar-1_cr-0_si-0_fr-0_tb-1_t-_ftc-_ftb-_mc-_mfc-_complete%20(1)-png.png)
22. If you have any other custom questions you would like to add, you can do so here. You can also include a description, and require the fields.
-png.png?width=670&height=503&name=22_800x600_z-undefined_mz-0-5_mi-1_ti-0_ar-1_cr-0_si-0_fr-0_tb-1_t-_ftc-_ftb-_mc-_mfc-_complete%20(1)-png.png)
23. Remember to click Add when you're done.
-png.png?width=670&height=503&name=23_800x600_z-undefined_mz-0-5_mi-1_ti-0_ar-1_cr-0_si-0_fr-0_tb-1_t-_ftc-_ftb-_mc-_mfc-_complete%20(1)-png.png)
24. If you have specific document uploads that should be included, you can also request those here. Start by naming the document you're requesting. Ensure you allow the upload and click require if needed. Remember to hit Add when you are done.
-png.png?width=670&height=503&name=24_800x600_z-undefined_mz-0-5_mi-1_ti-0_ar-1_cr-0_si-0_fr-0_tb-1_t-_ftc-_ftb-_mc-_mfc-_complete%20(1)-png.png)
25. If you have a PDF document you would like available for download then you can paste the URL here.
-png.png?width=670&height=503&name=25_800x600_z-undefined_mz-0-5_mi-1_ti-0_ar-1_cr-0_si-0_fr-0_tb-1_t-_ftc-_ftb-_mc-_mfc-_complete%20(1)-png.png)
26. If you have any supplemental SDL Forms you would like completed and attached to this application, you can add them here. Open the drop down menu, which will display all of your municipality's active forms, and select the one you would like to use.
-png.png?width=670&height=503&name=26_800x600_z-undefined_mz-0-5_mi-1_ti-0_ar-1_cr-0_si-0_fr-0_tb-1_t-_ftc-_ftb-_mc-_mfc-_complete%20(1)-png.png)
27. You have the option to add a description and instructions for these as well. Require the form if needed. Don't forget to hit Add when you are done.
-png.png?width=670&height=503&name=27_800x600_z-undefined_mz-0-5_mi-1_ti-0_ar-1_cr-0_si-0_fr-0_tb-1_t-_ftc-_ftb-_mc-_mfc-_complete%20(1)-png.png)
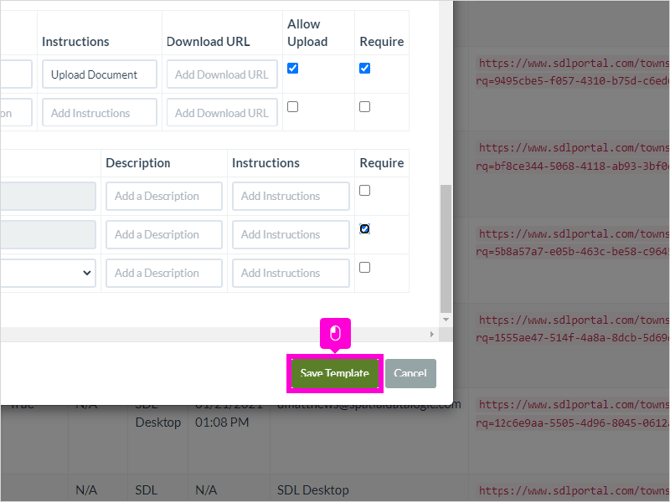
28. Scroll down and click Save Template
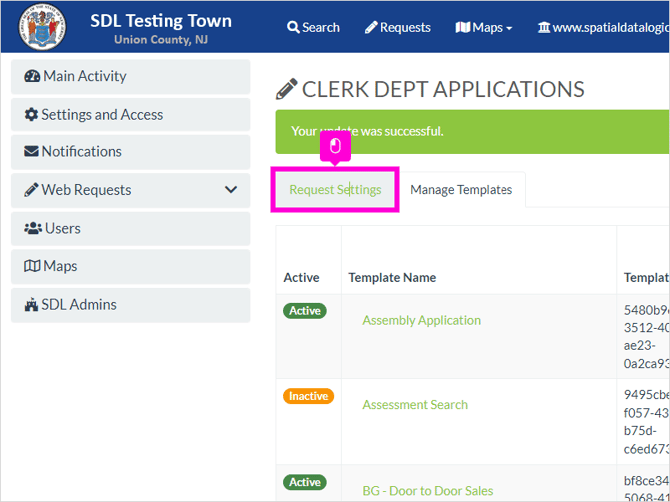
29. Click Request Settings
30. Click Save Settings
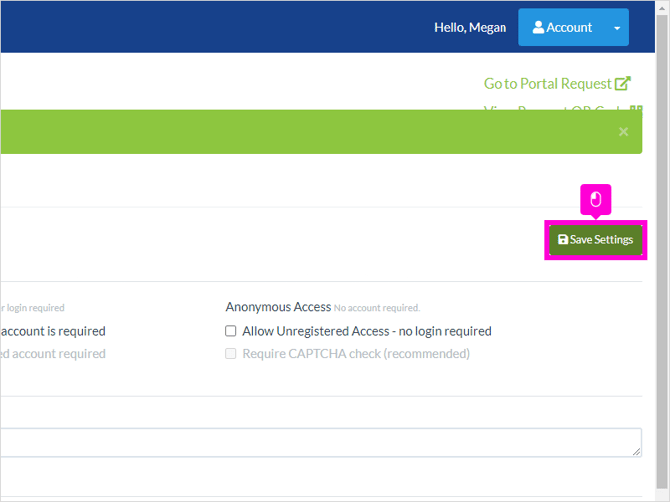
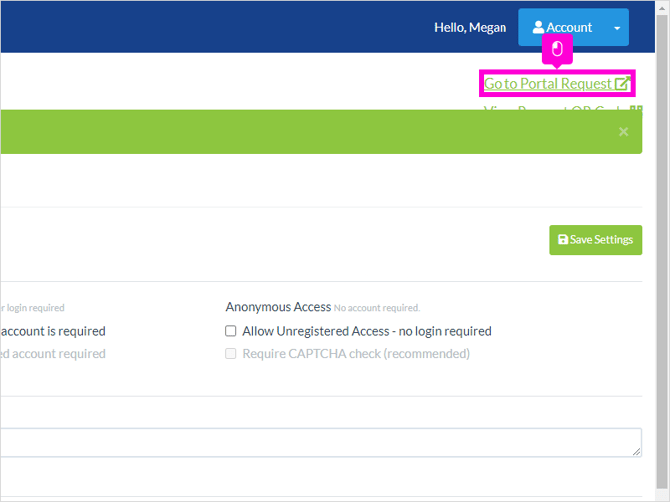
31. Click Go to Portal Request to see your live application, and you're done.