In either Forms or Permits, there are several ways to work with the data grid in SDL Connect.
Sorting
To sort by a column, click on the column name. To change between ascending or descending, click again.

Filtering
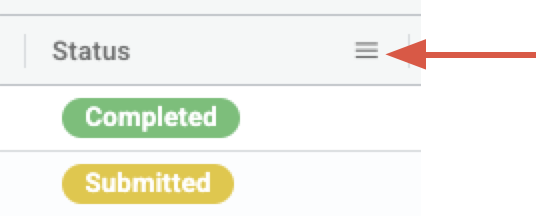
To filter the data that is visible, click on the three-line hamburger menu next to the column name:
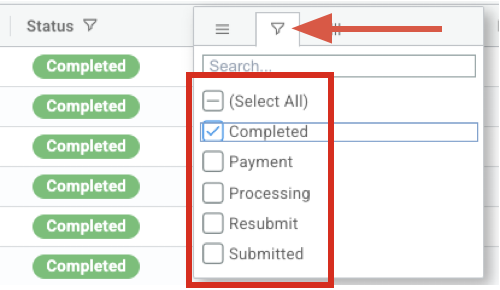
Then select the filter icon and choose which values you want to show in the grid. The values will filter immediately. To remove the filter, click Select All.
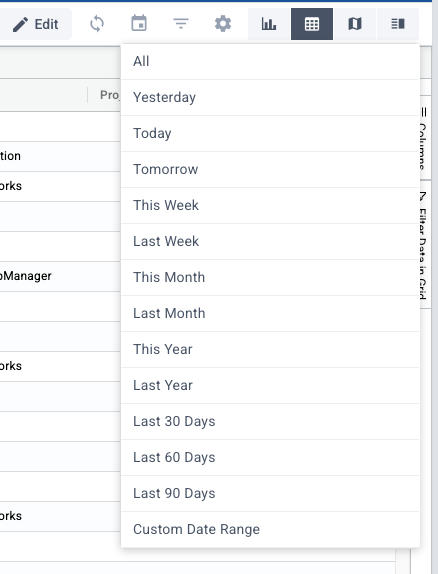
To filter by date, choose the calendar icon in the top right:

Then select a time frame or custom date range:
To filter by multiple values - such as status and time frame - choose the filter icon in the top right:

Then enter the different values and dates you want to filter by:

View by Row Groups
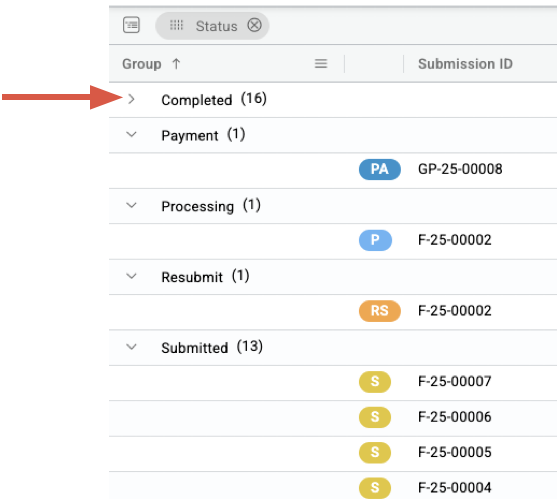
To change the view to be sorted by row groups of certain values, you have two options. First, simply click and hold on the selected column name, then drag it onto the gray box that says "Drag here to set row groups":

That will regroup the items into the various values of that category. Groups can be collapsed or opened by clicking on the arrow to the left:
Hide or Show Columns
There are two ways to change which columns you see in the data grid. Both of these will only change the view of the user, not the view for everyone.
The first option is through the hamburger menu to the right of any column name. Click on it:
-1.png?width=640&height=260&name=mceclip0%20(3)-1.png)
Then click the icon on the right to see the available columns. From this list, check or uncheck the columns you wish to show or hide.
-1.png?width=558&height=290&name=mceclip1%20(1)-1.png)
The second option is on the right side of the data grid, choose "Columns":
-1.png?width=670&height=186&name=mceclip2%20(1)-1.png)
Then you can select which columns you want to show or hide:
-1.png?width=670&height=269&name=mceclip3%20(1)-1.png)